
Credentials are similar to permission slips that let n8n access your accounts, and without any provided credentials, nodes can’t actually do anything with external services.
Here’s the complete roadmap of n8n for beginners
So basically you’ve to set them up at first then we can create workflow with app nodes easily.
- You’ve learned workflows and nodes, but now comes the real struggle, connecting to actual services.
- Every external service (Gmail, Slack, Sheets) needs authentication
- This guide shows you exactly how to connect the most popular services step by step.
- By the end, you’ll have Gmail connected and ready to automate.
Why n8n needs credentials?
- Services need to verify it’s really you making requests
- Protects your data from unauthorized access
- Each service has different security requirements
Prerequisites
Before you start setting up credentials in n8n, make sure you have,
- A Google Account
- You’ll need a Gmail account to access Google Cloud Console also known as GCC.
- Use a dedicated account for automation if you’re working on business projects.
- An n8n Instance
- Self-hosted n8n running locally typically (http://localhost:5678)
- or n8n Cloud account
- Make sure you can access your n8n dashboard
- Basic Understanding
- Know what workflows and nodes are (covered in our previous posts)
- Understand why you’re connecting these services
Google Cloud Console Setup (One Time + OAuth Consent Screen)
This is a very crucial step, you’ll only need to do this once for all google services (Gmail, sheets, maps, and etc)
Step 1 – Access Google Cloud Console
- Go to https://console.cloud.google.com/
- Sign in with your Google account
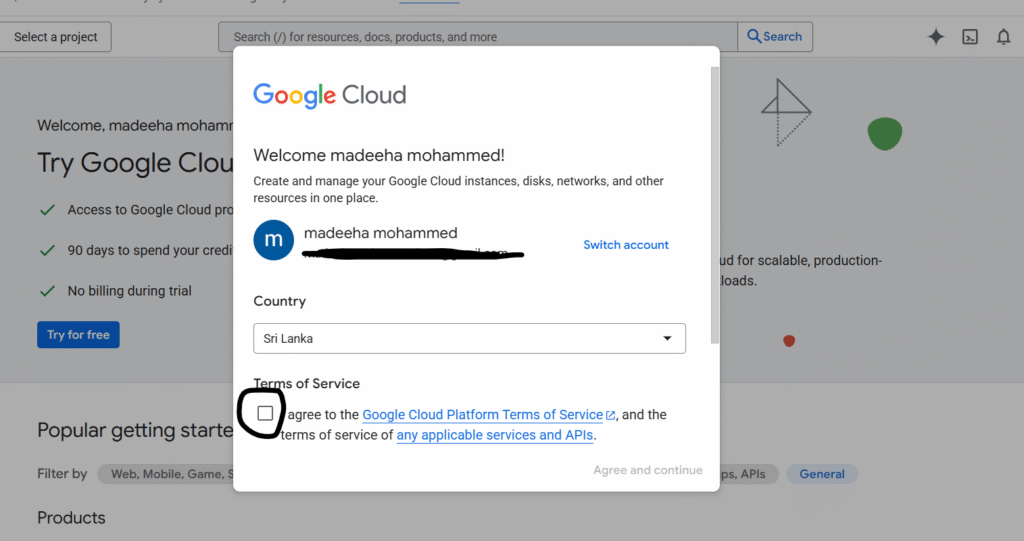
- Accept the Terms of Service and continue
Step 2: Create a New Project
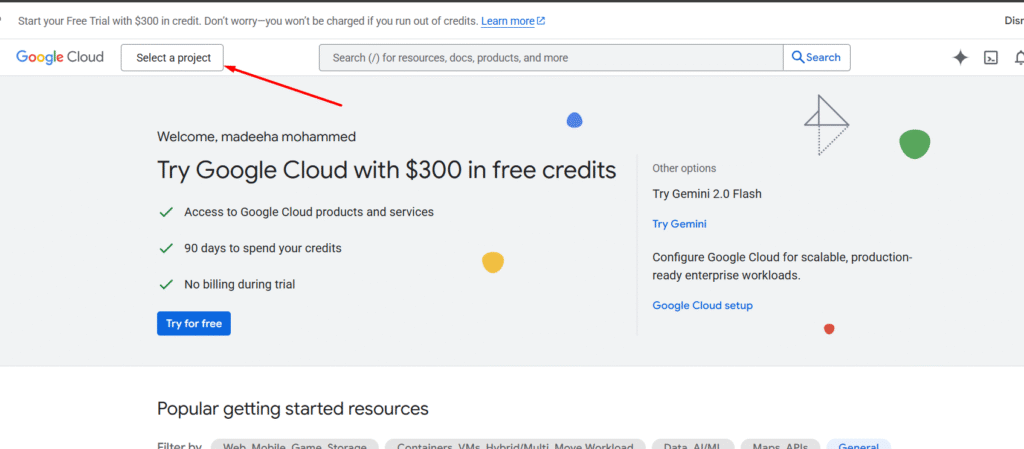
- Click on the “Select a Project” button next to “Google Cloud”
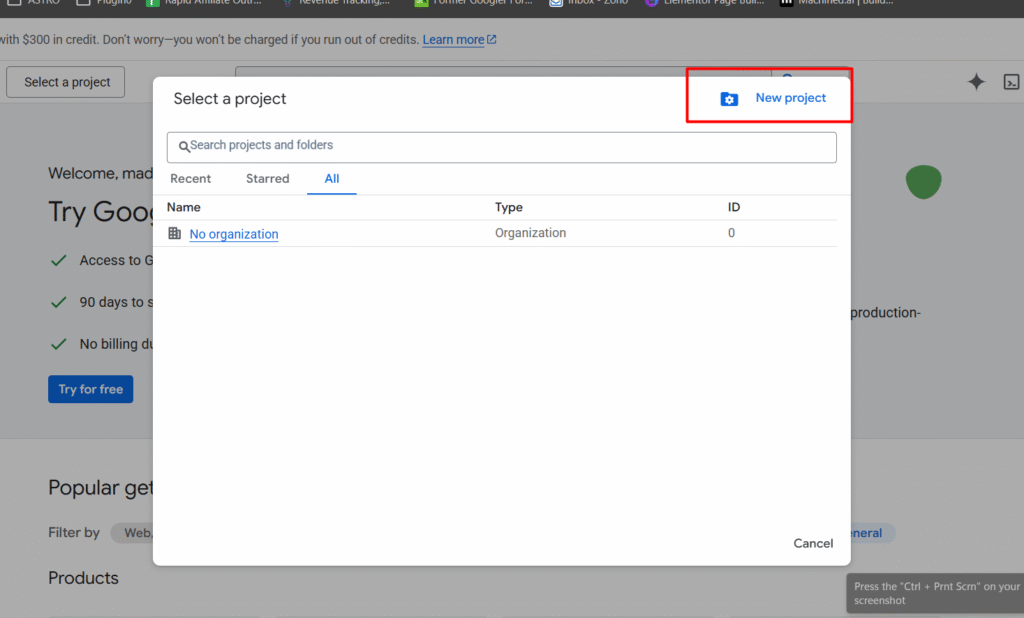
- Click on New project
- Enter a project name, and click on create.
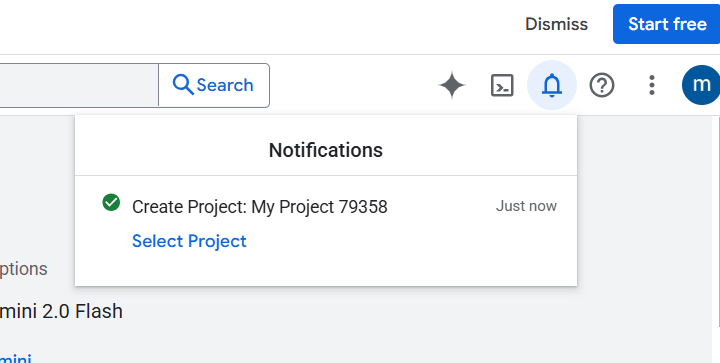
- You’ll receive a notification that project has been created
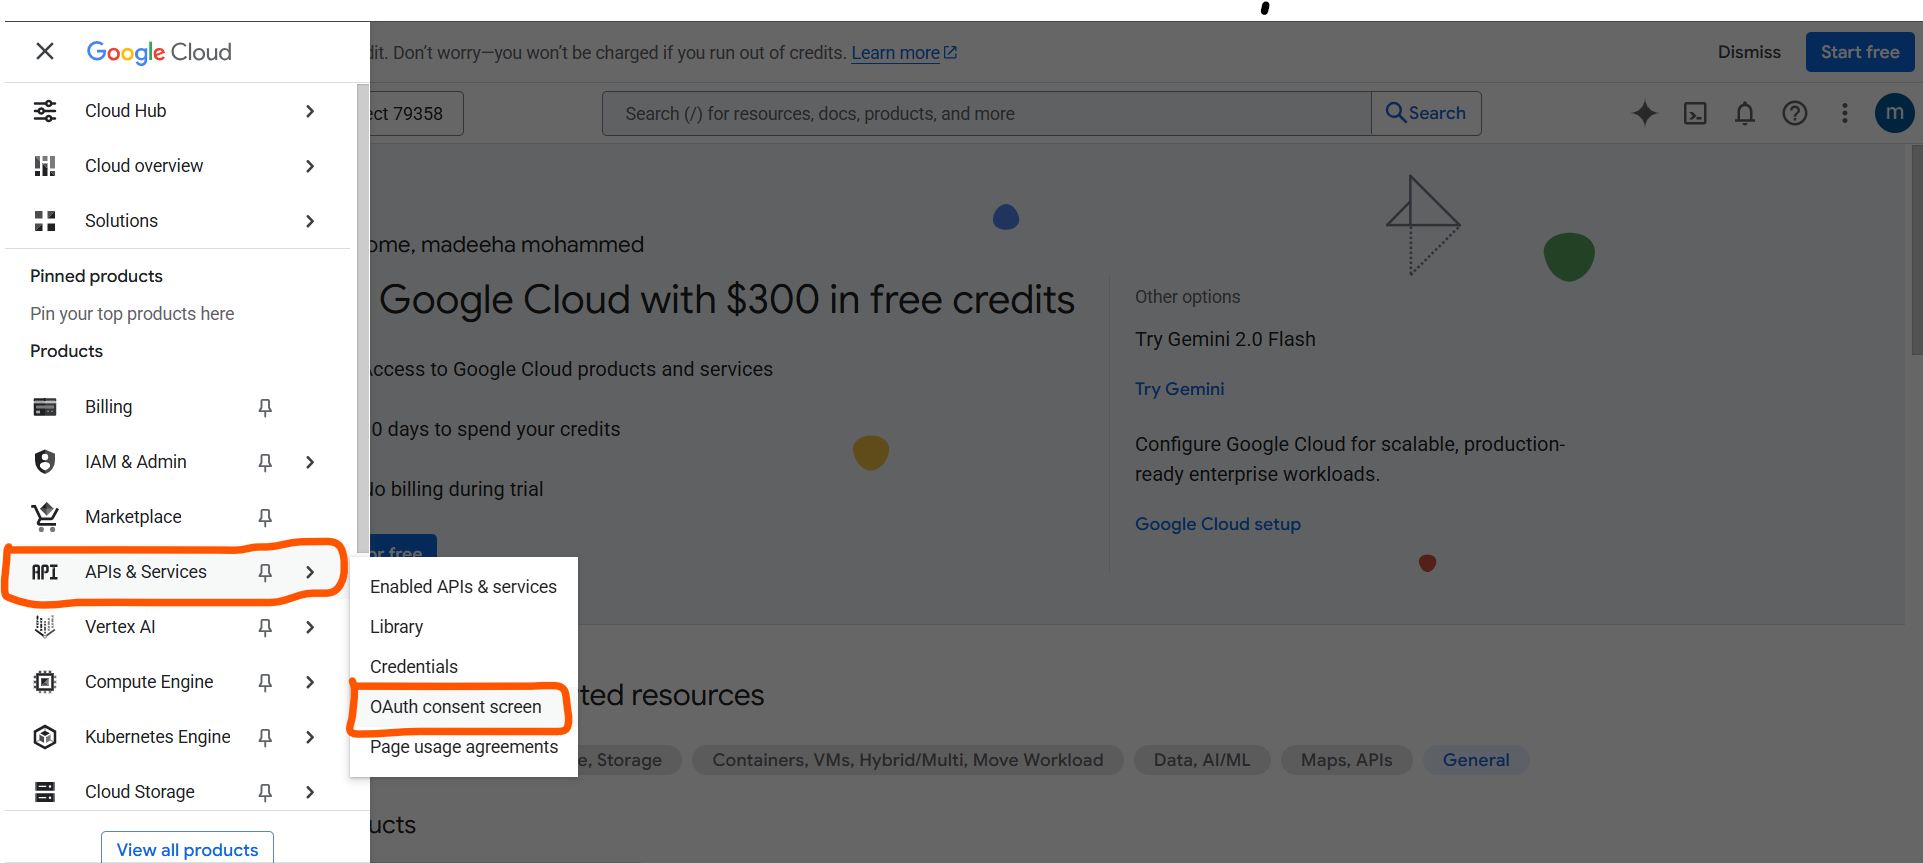
- Go to APIs & Services > OAuth consent screen
- Click on Get Started
- Provide any app name you prefer.
- User support email: click on the drop down and select your gmail address
- Click on next
- Audience: Select external. If you have a workspace account then you can select on internal
- Contact Information: Add your email address.
- Finish the setup by agreeing to the user data policy.
Step 3: Add Test Users
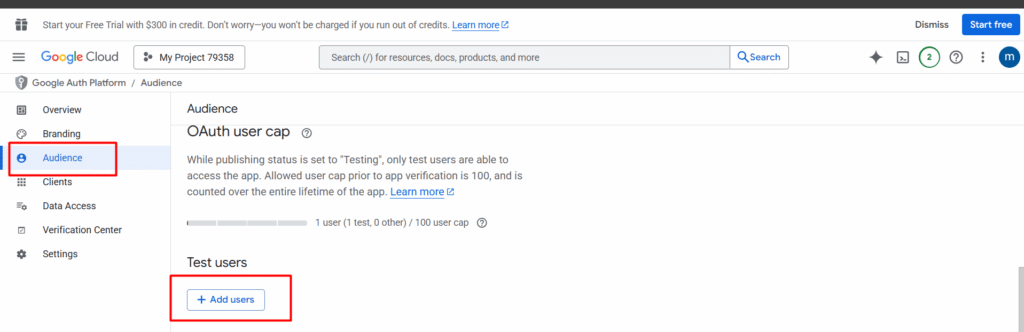
- Click Add users, and add your email address right there.
Step 4: Let’s Create an OAuth Client
- Go to Clients > Create a Client
- Select Application Type as Web Application
- Name your web client, Like “n8n client”
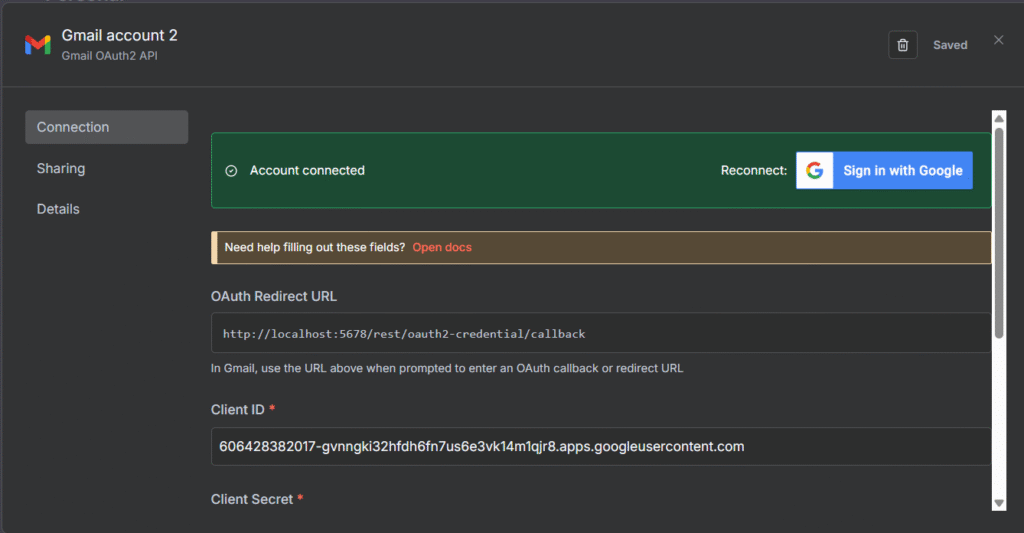
- For Authorized Redirect URIs: http://localhost:5678/rest/oauth2-credential/callback – Add this URL
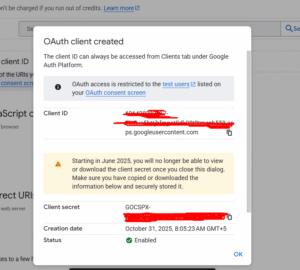
- Click Create.
- A modal appears with Client ID and Client Secret, make sure to copy those values and save it on your desktop.
Alright, it’s time to add these credentials to n8n.
Gmail Credential Setup
Step 1: Enabling the Gmail API
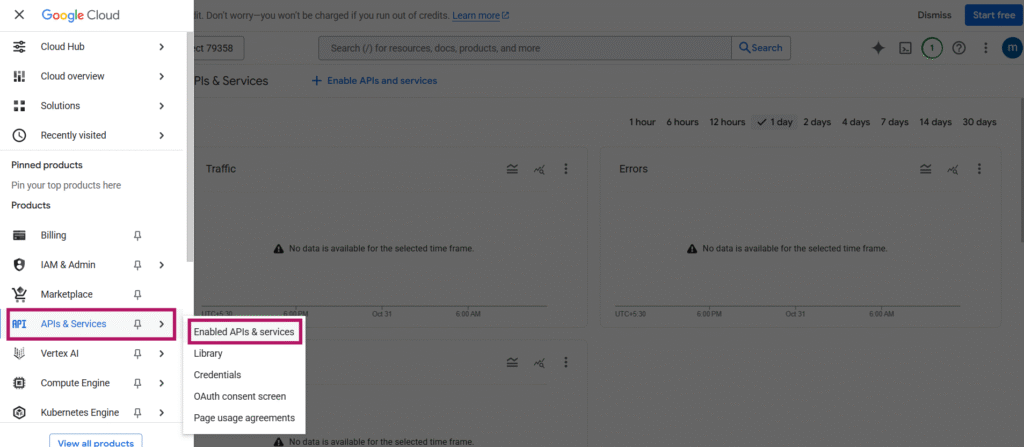
- Go to Google Cloud Console > APIs & Services > Enabled APIs & Services
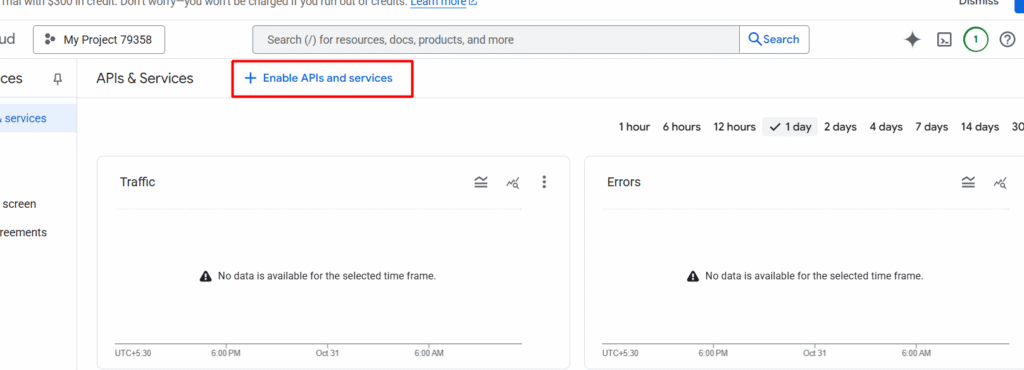
- Make sure to click on the Enable APIs and services
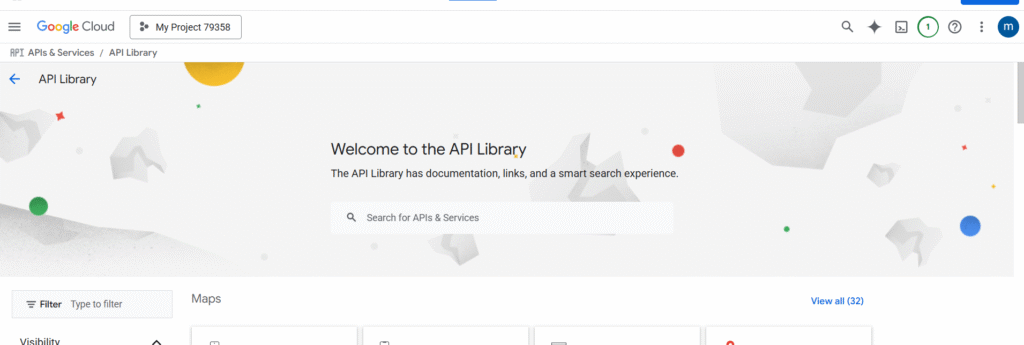
- Search for Gmail API
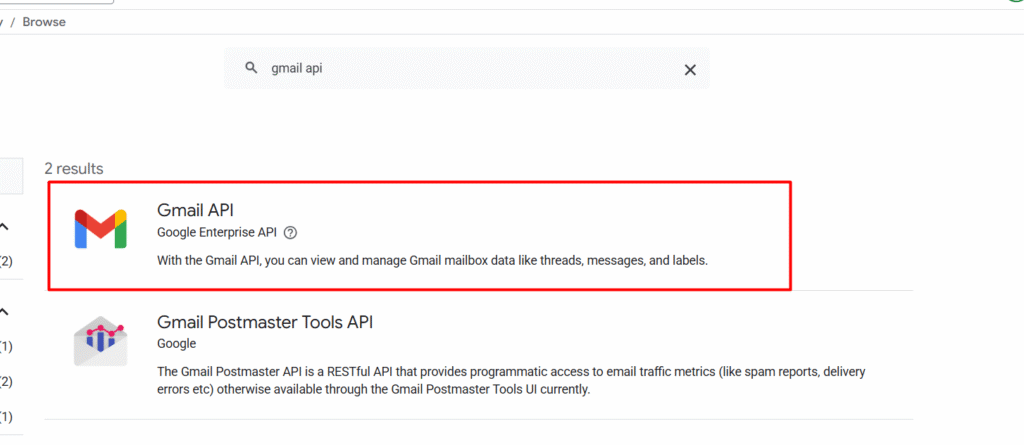
- Select the first result which is Gmail API by Google Enterprise API.
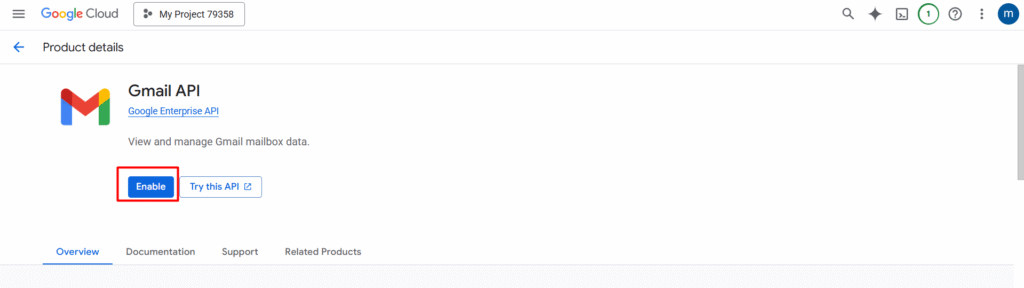
- Click on Enable the API.
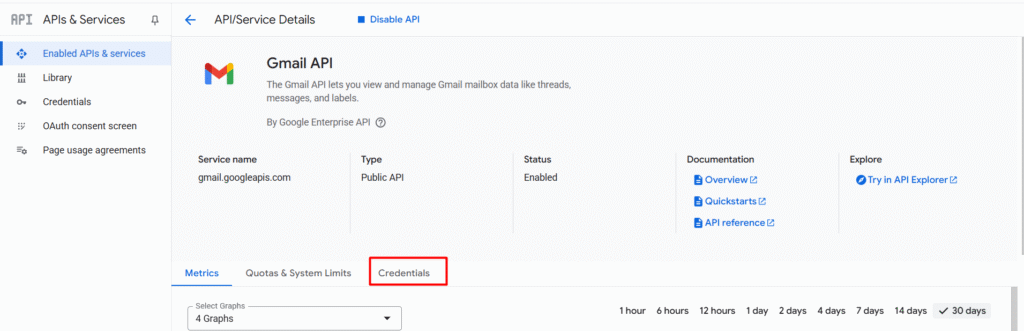
- Go to Credentials section on the navigation
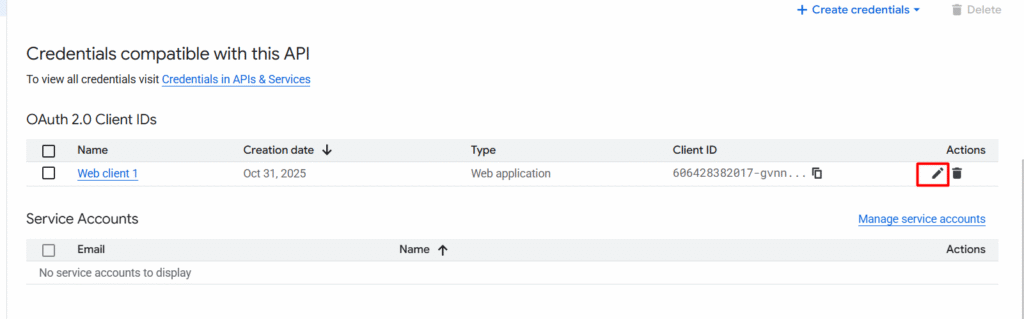
- In the credentials section, you can see that previously created OAuth 2.0 client ID while we creating the OAuth consent. Now click on the pencil icon to edit, then you will see the Client ID and the secret.
- Make sure to copy the both ID and secret.
Step 2: Adding the Credentials on n8n
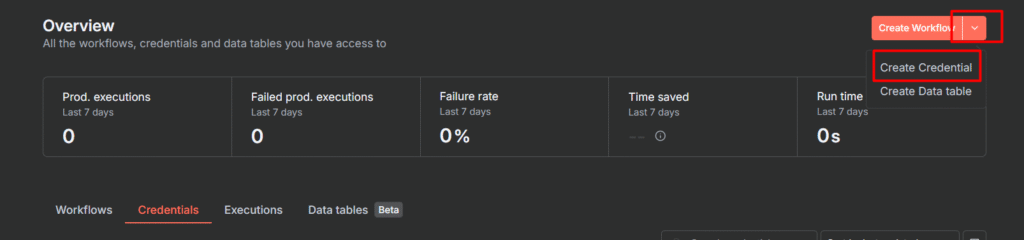
- Go to your n8n dashboard > credentials section or Click on the dropdown and select Create credential
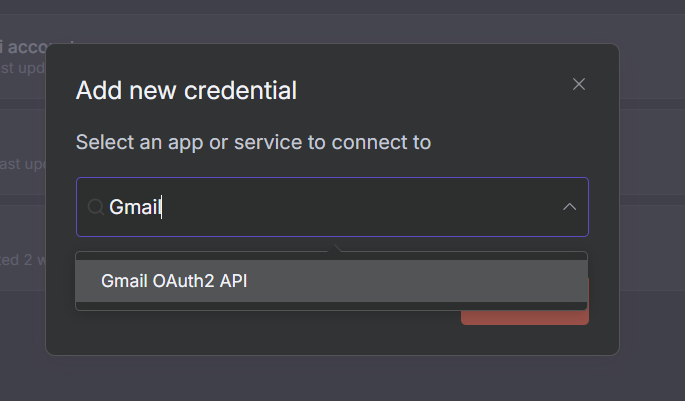
- Search for Gmail, and select Gmail OAuth2 API.
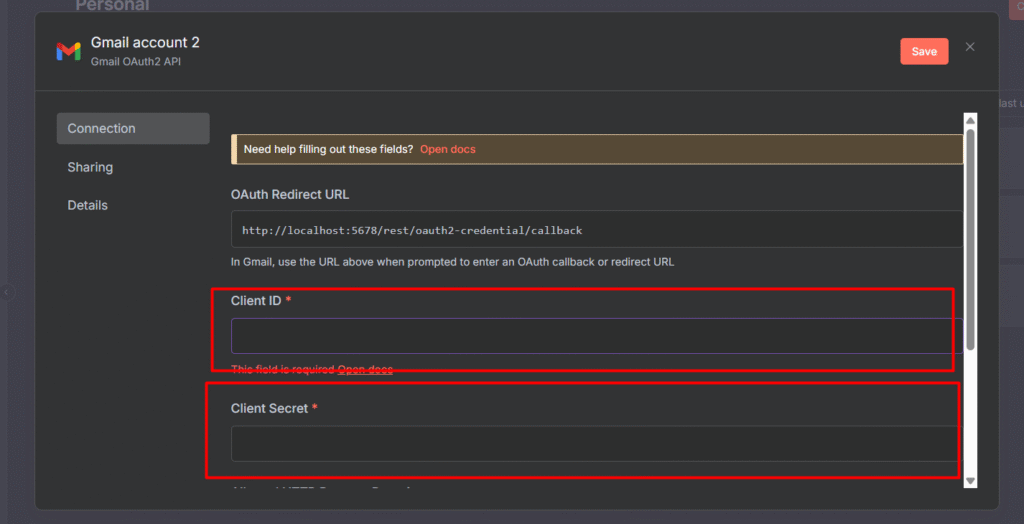
- Paste the Client ID and Client Secret
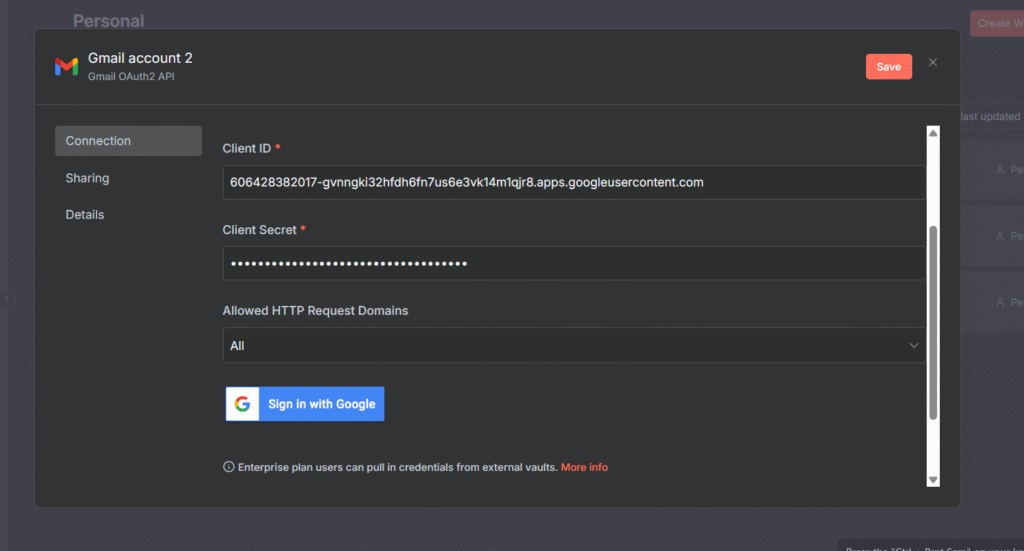
- Once you paste the ID and secret, then make sure to Sign in with Google. (sign-in with your gmail account that you have assigned as a test-user)
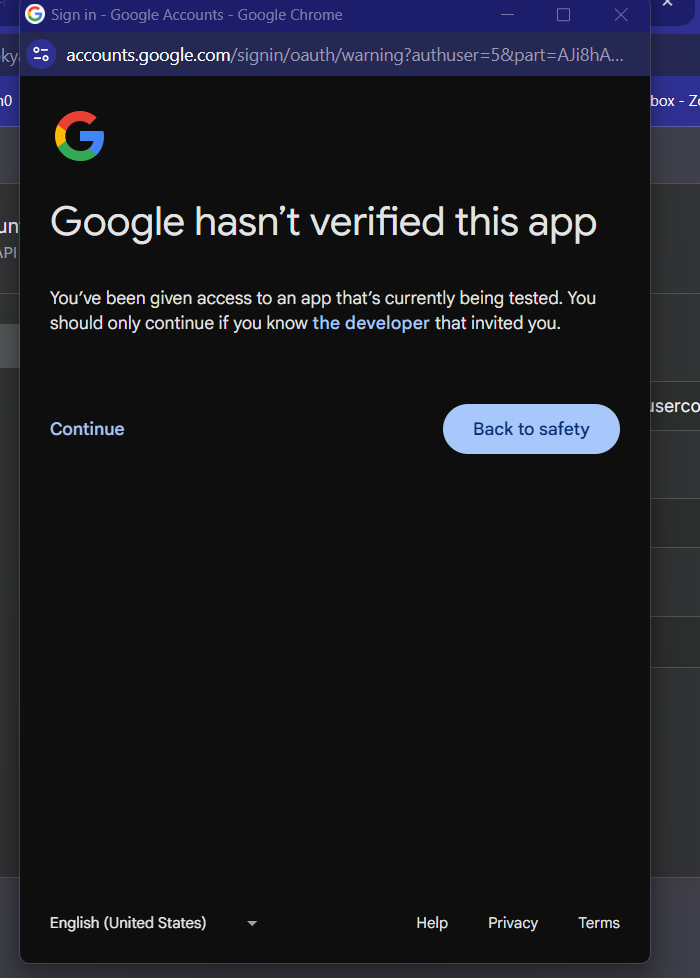
- Click on continue
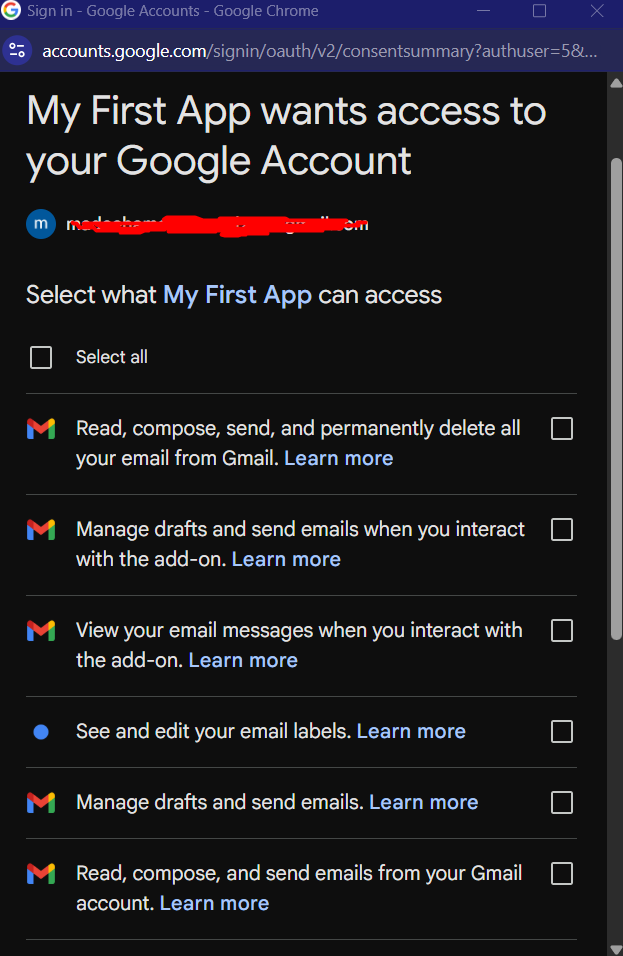
- Now select all the access and continue, and you will receive a pop-up window says credentials successful.
- Even in your credentials are connected. so we can test it out whether everything is working fine.
Testing Gmail Connection
Let’s verify everything works by sending a test email.
Create a Test Workflow
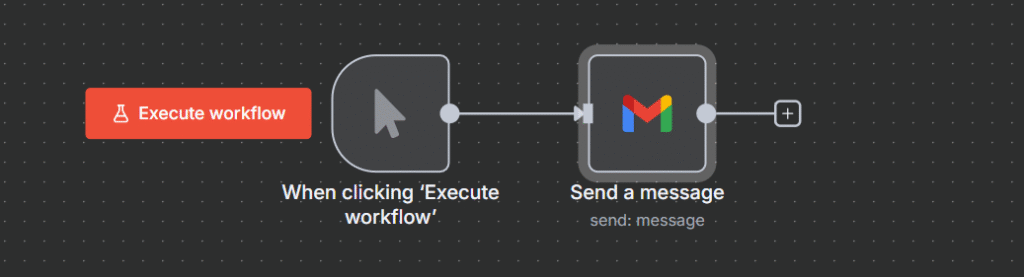
- In your n8n dashboard, click Create workflow
- Add a manual trigger node (this lets you start the workflow manually)
- Add a Gmail node.
- Connect the Manual trigger to Gmail node
Configure Gmail Node
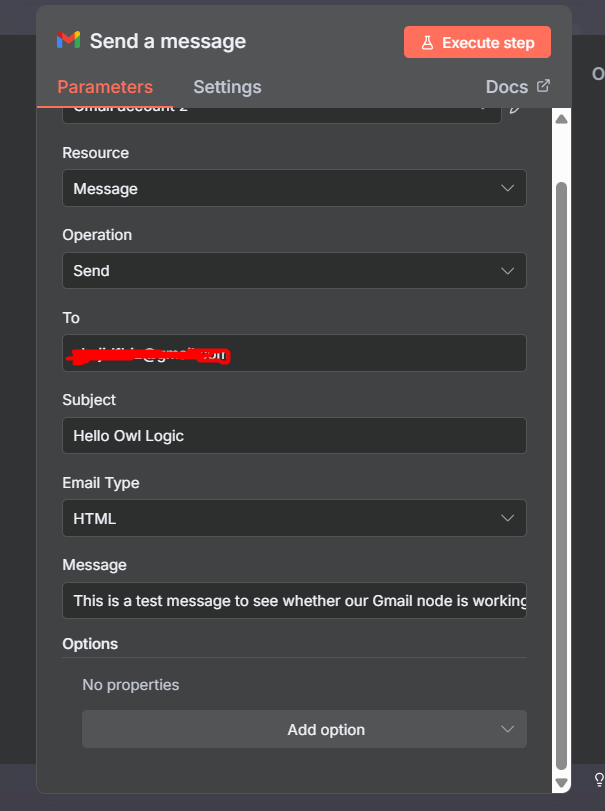
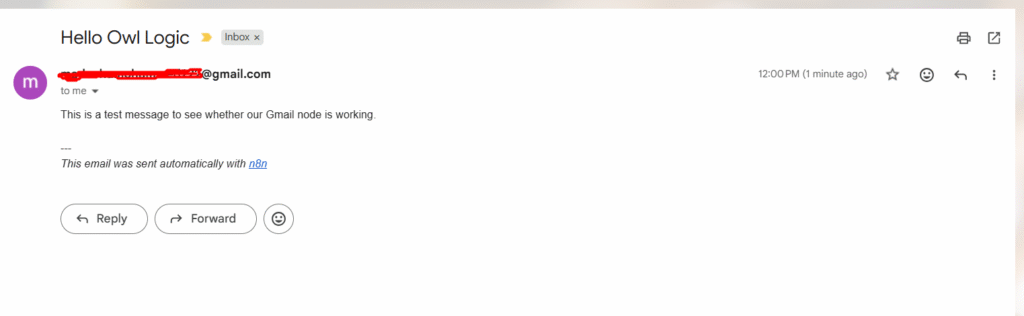
- In the Gmail node, select “Send a message” action.
- Fill in the fields
- To: your own email address or any other email address owned by you for testing.
- Subject: “Test from n8n”
- Message: This is a test email from my n8n workflow!
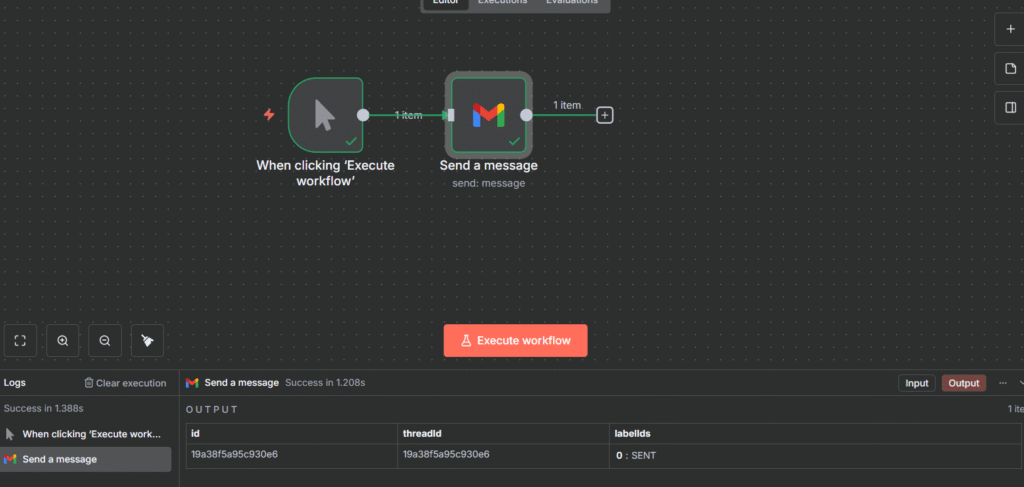
Execute & Verify
- Click the Execute workflow
- Check the output – you should see
labelIds:["sent"] - Open your Gmail inbox.
- Look for the test email
Final Thoughts
Congratulations! You’ve successfully set up Gmail credentials in n8n, and sent your first automated email. Here’s what you accomplished.
- Configured Google Cloud Console – Created a project and set up OAuth consent screen (one-time setup for all Google services)
- Generated OAuth Credentials – Created Client ID and Client Secret for secure authentication
- Enabled Gmail API – Activated the Gmail API in Google Cloud Console
- Connected n8n to Gmail – Added credentials and authorized n8n to access your Gmail account
- Tested the Connection – Created and executed a workflow that sent a test email
You’ve cleared the biggest hurdle in n8n automation. From here, the possibilities are endless.