
There are two ways to authenticate with Slack in n8n, and they behave completely different.
Pick the wrong one and your messages will come from your personal account instead of a bot, or your Slack Trigger will stop firing in production without any obvious error.
This post covers both use cases , sending messages from n8n to Slack, and triggering workflows from Slack events along with the four errors that catch almost everyone. The most common ones.
But you need to understand how these credentials works.
This is part of my complete n8n beginner guide — where I cover everything from install to AI agents.
Bot Token or OAuth2? Pick Your Credential Before You Start
This is the decision that determines everything else. Most tutorials skip it and explain it only after something goes wrong.
| What you’re trying to do | Credential type | Token |
|---|---|---|
| Send messages as a bot | Access Token | xoxb- (Bot User OAuth Token) |
| Trigger workflows from Slack events | OAuth2 API | Client ID + Client Secret |
| Send messages as yourself | OAuth2 API | xoxp- (User OAuth Token) |
For most automation setups, you want the Access Token method with a bot token. This sends messages from a named bot, not from your personal Slack profile.
OAuth2 is required for the Slack Trigger node. It doesn’t work with the Access Token method. If you want both, a workflow that listens for Slack events AND sends replies – you’ll need two separate n8n credentials: one OAuth2 for the trigger, one Access Token for the send node.
Setting Up Your Slack App (Do This Once)
Both credential types require a Slack app. You create it once and then pull different tokens from it depending on what you need.
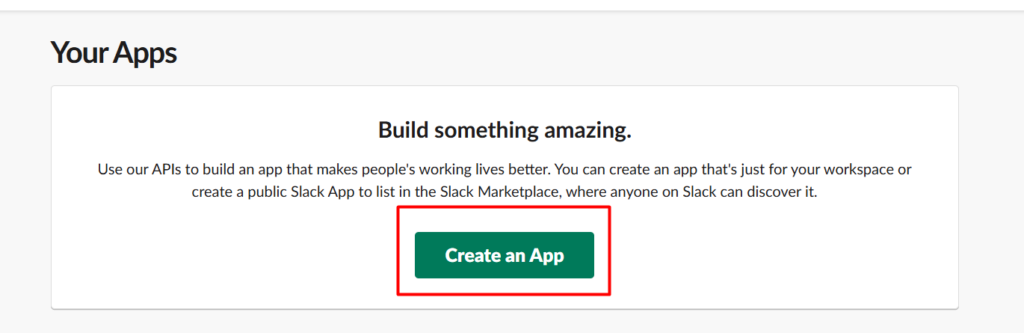
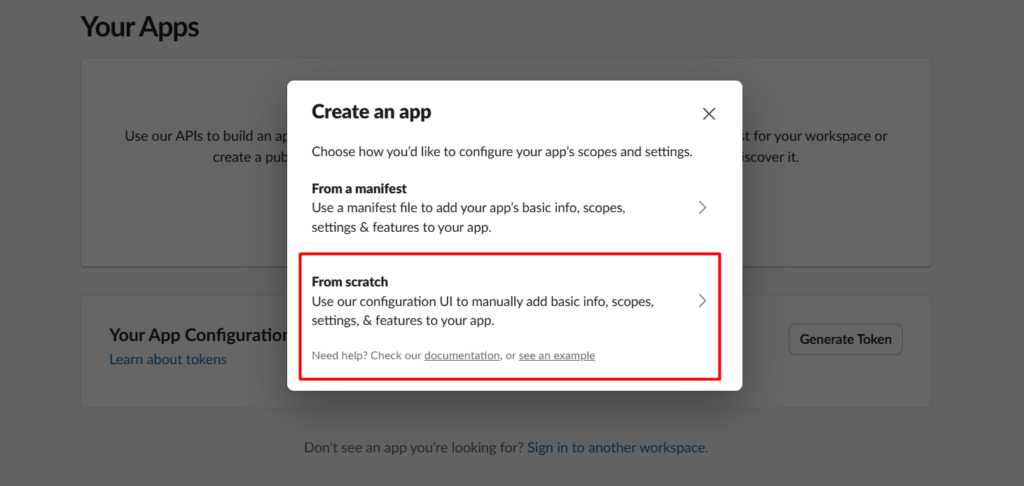
Step 1: Go to api.slack.com/apps and click Create New App → From scratch.
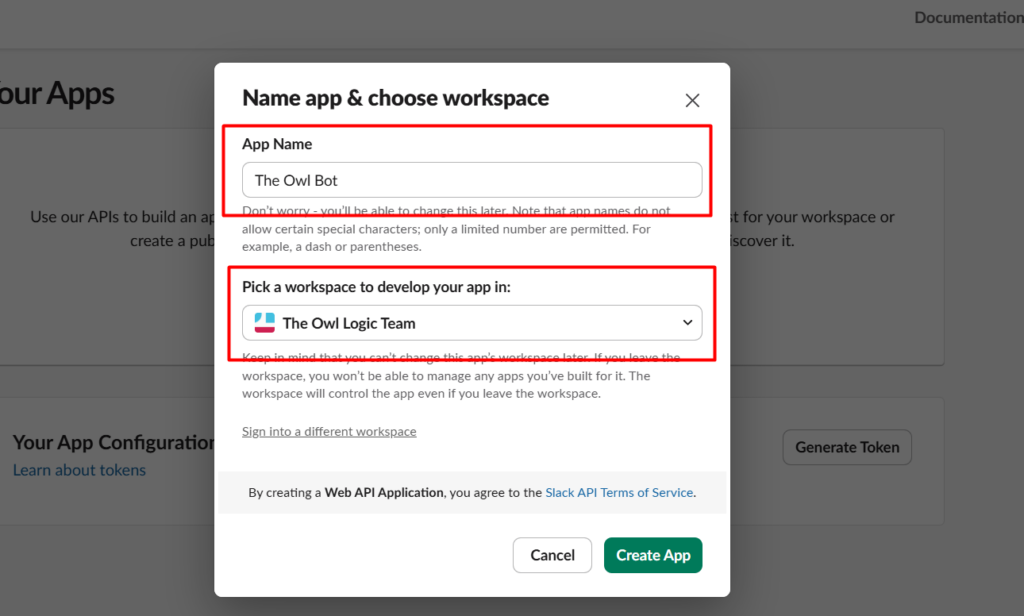
Step 2: Give your app a name (something like “n8n Bot”) and select the workspace where you want it to work. Click Create App.
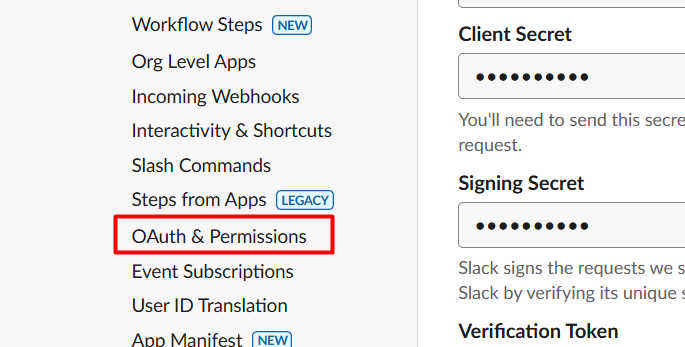
Step 3: In the left sidebar, go to OAuth & Permissions. Scroll to the Scopes section and add your Bot Token Scopes.
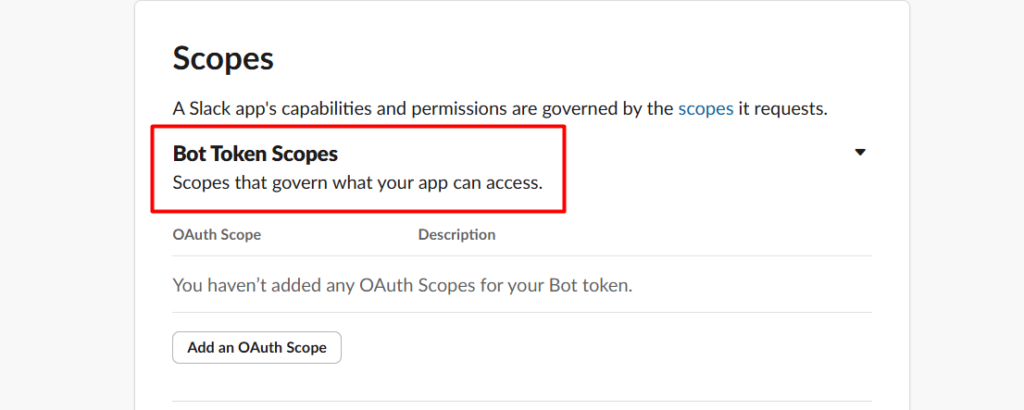
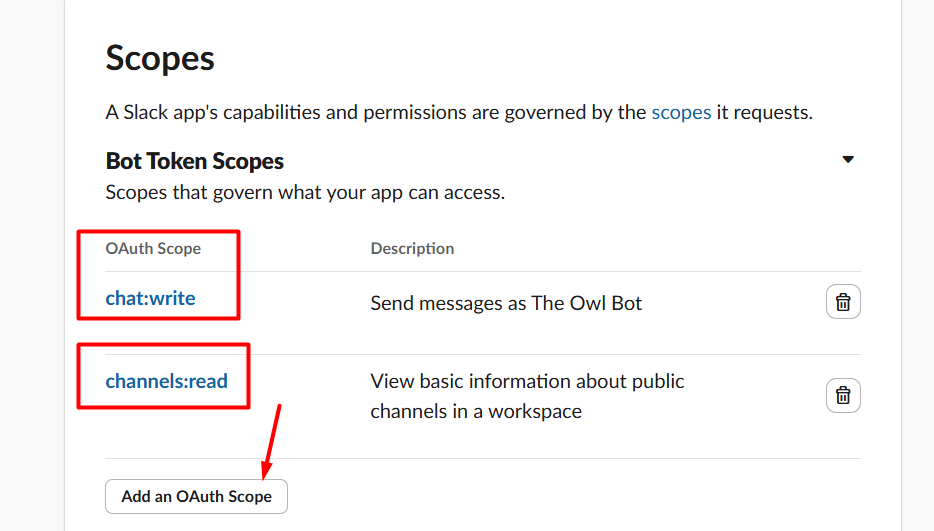
Minimum scopes to send messages:
chat:write– post messages to channelschannels:read– list channels so you can pick one in n8n
If you’re also setting up the Slack Trigger, add these too:
channels:history– read messages in channelsreactions:read– detect emoji reactionsusers:read– resolve user IDs to names
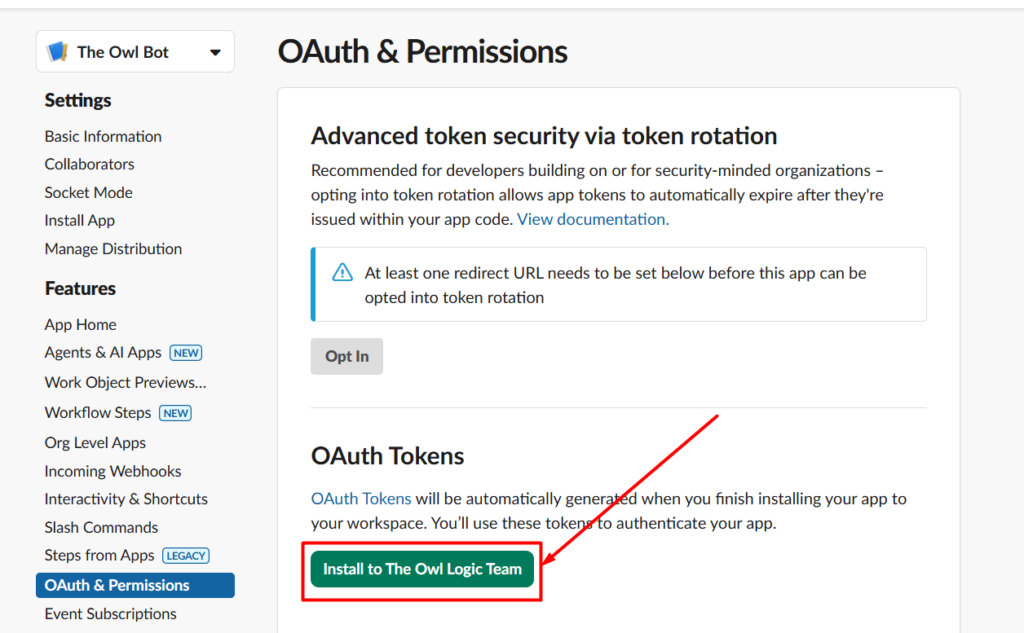
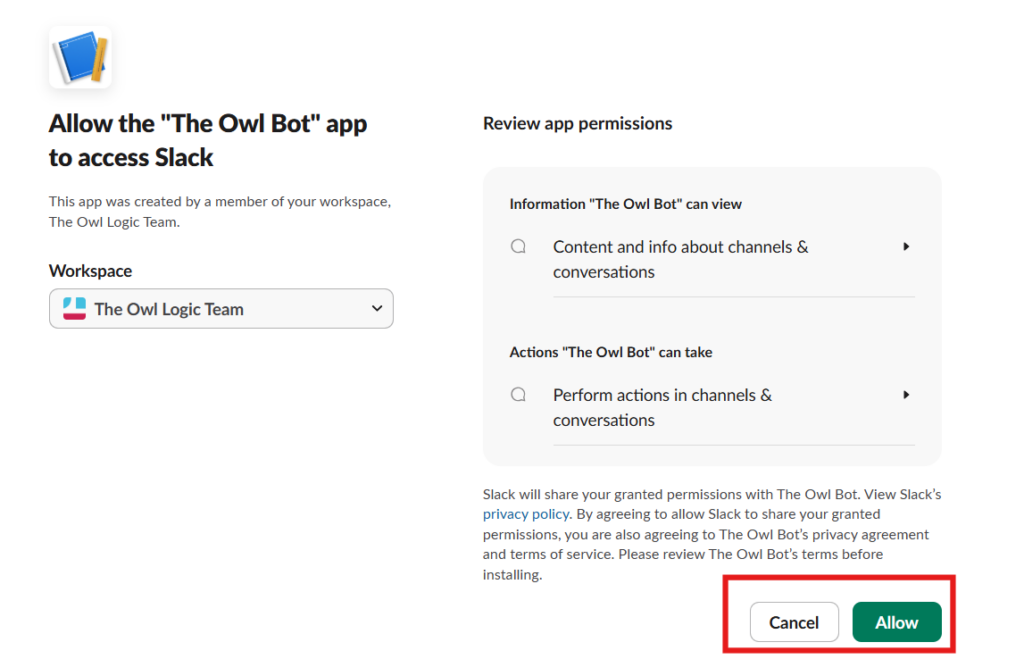
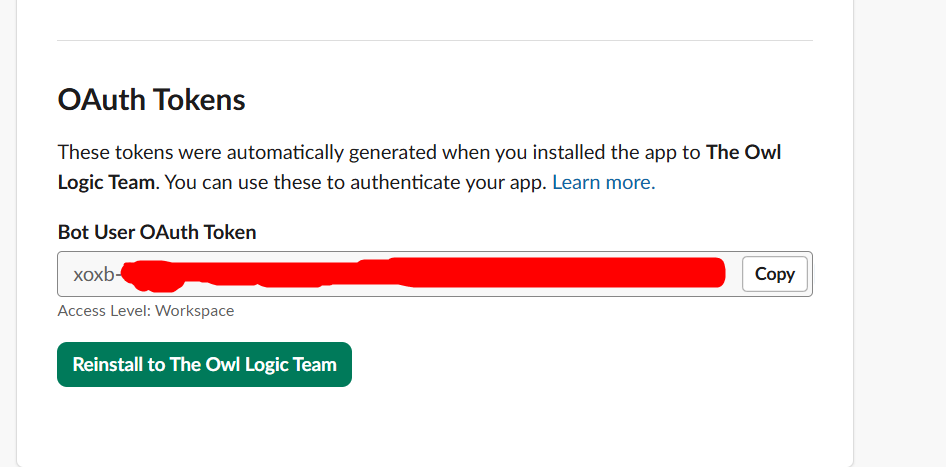
Step 4: Scroll up to OAuth Tokens for Your Workspace and click Install to Workspace. You need to be a workspace admin to do this.
Step 5: After installing, copy the Bot User OAuth Token. It starts with xoxb-. Keep this — it’s your Access Token credential.
Token rotation warning. Slack may present a “Token Rotation” option when you create the app. Do not enable it. Token rotation makes your
xoxb-token expire every 12 hours. Workflows that were running fine will start failing silently in production. The critical part: once you enable token rotation, you cannot turn it off. You’d need to create an entirely new Slack app. Leave this off.
Sending Messages from n8n to Slack
With your xoxb- token copied, here’s how to wire it up in n8n.
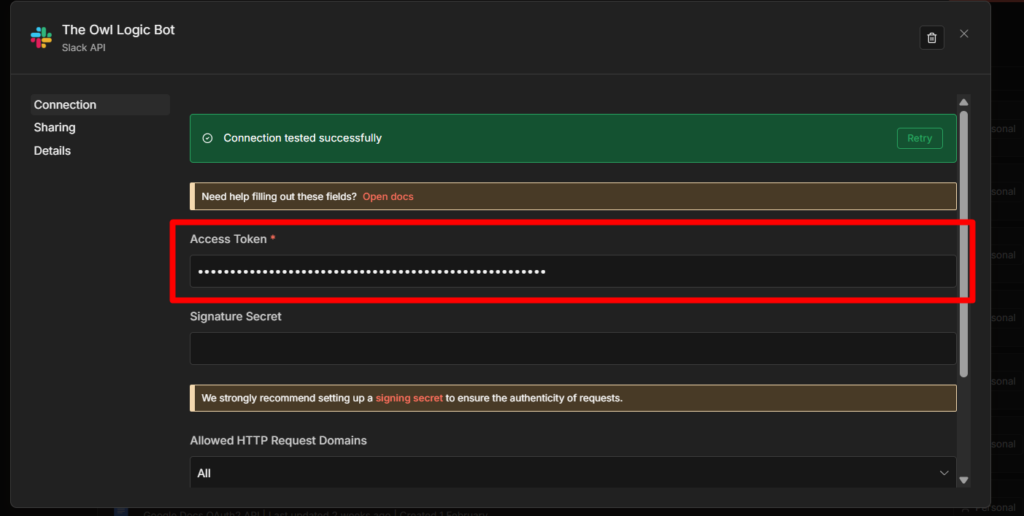
In n8n Credentials, create a new Slack credential. When it asks for the authentication method, choose Access Token. Paste your xoxb- bot token. Save it.
In your workflow, add a Slack node. Open it and configure:
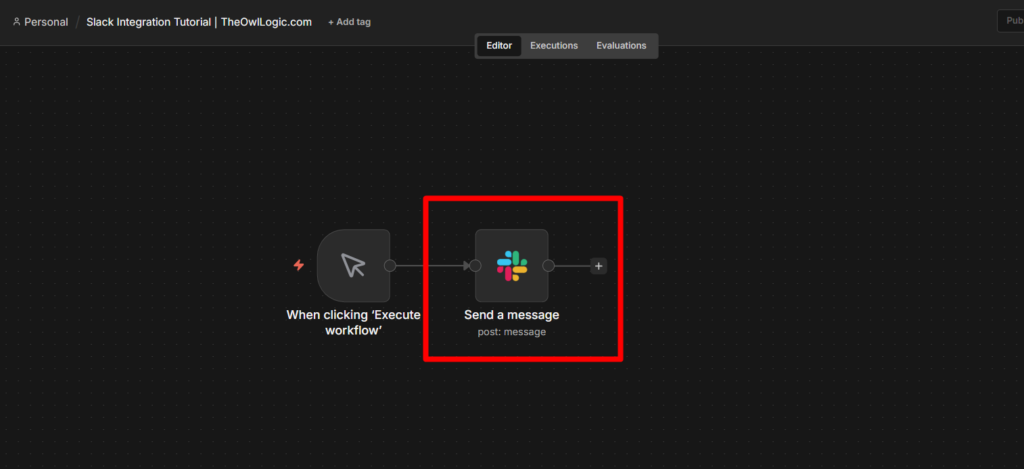
- Resource: Message
- Operation: Send
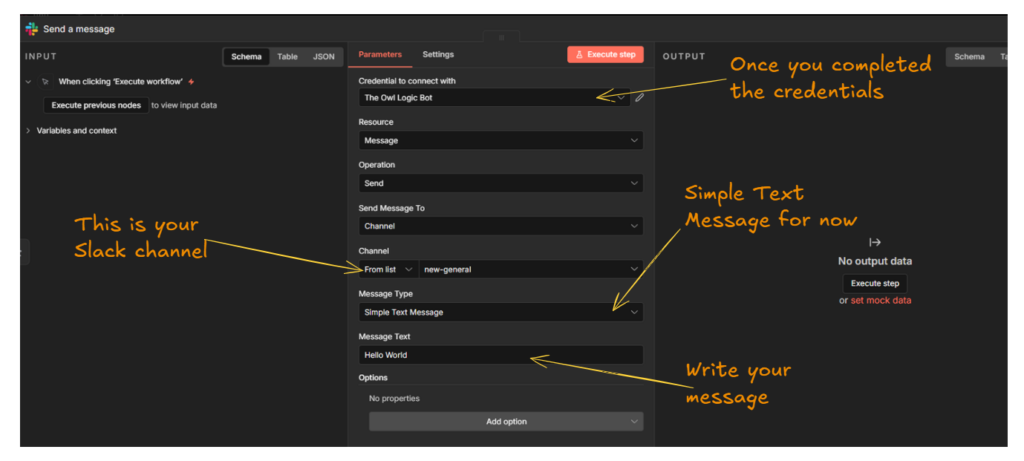
- Credential: the Access Token credential you just created
- Channel:
#your-channel-nameor paste a channel ID - Text: your message content
A realistic message with dynamic data from a previous node looks like this:
New lead from {{ $json.name }}
Email: {{ $json.email }}
Source: {{ $json.source }}
Submitted: {{ $now.format('MMMM D, YYYY') }}
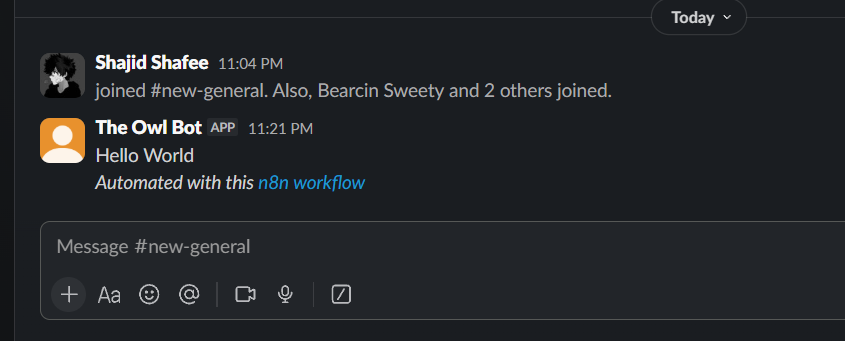
Or Else, Just say
HELLO WORLD! Click Execute Node. If it works, great. If you get not_in_channel, see the troubleshooting section below — the fix takes 10 seconds.
Read this,
The bot must be invited to the channel. A Slack bot cannot post to any channel it hasn’t been explicitly added to. Go to the channel in Slack and type
/invite @YourBotName. (e.g., mine is /invite @The Owl Logic Bot) This is a Slack permission rule, not an n8n limitation. Once invited, rerun the node and the message will go through.
Triggering Workflows from Slack Events
This direction is more involved. You’re telling Slack to call n8n whenever something happens, a message arrives, someone mentions your bot, a reaction is added.
But here’s the hiccup. To make this trigger workflow work, You need to have a Self-hosted n8n or n8n Cloud. I recommending the n8n cloud since you won’t be having any issue and less prone to configurations.
Even though If you’re working in localhost, then you have to expose your localhost webhook URL to ngrok by tunneling. You can check it out here Webhook in n8n for Beginners
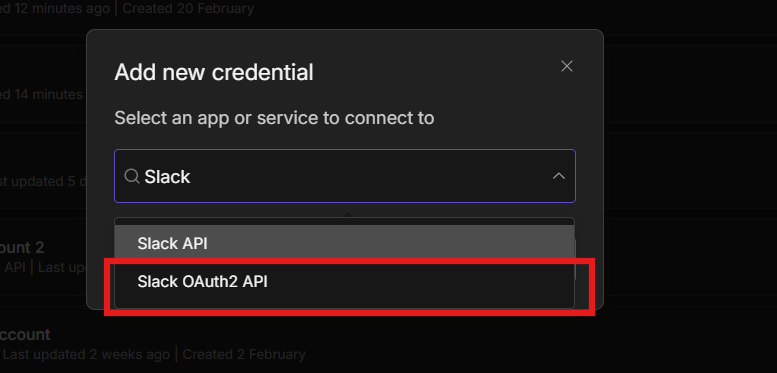
Step 1: Create an OAuth2 Credential in n8n
In n8n Credentials, create a new Slack OAuth2 API credential. It will ask for a Client ID and Client Secret. Get these from your Slack app:
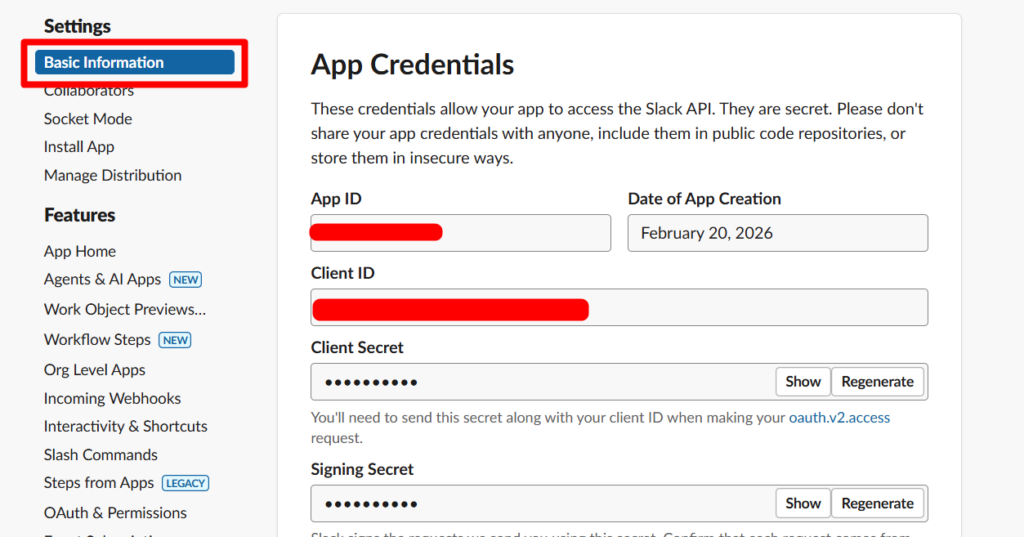
In your Slack app settings → Basic Information → App Credentials section. Copy the Client ID and Client Secret into n8n.
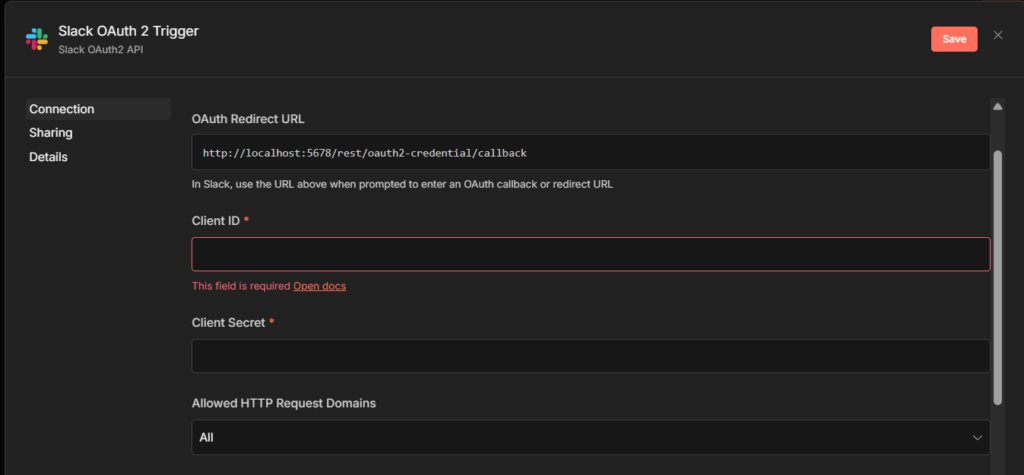
n8n will show you an OAuth Callback URL. Copy it.
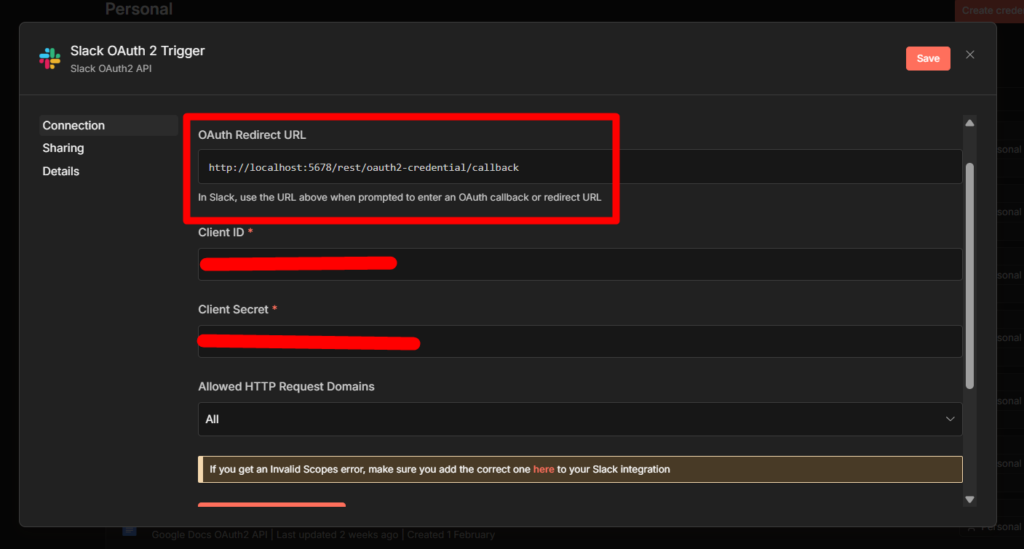
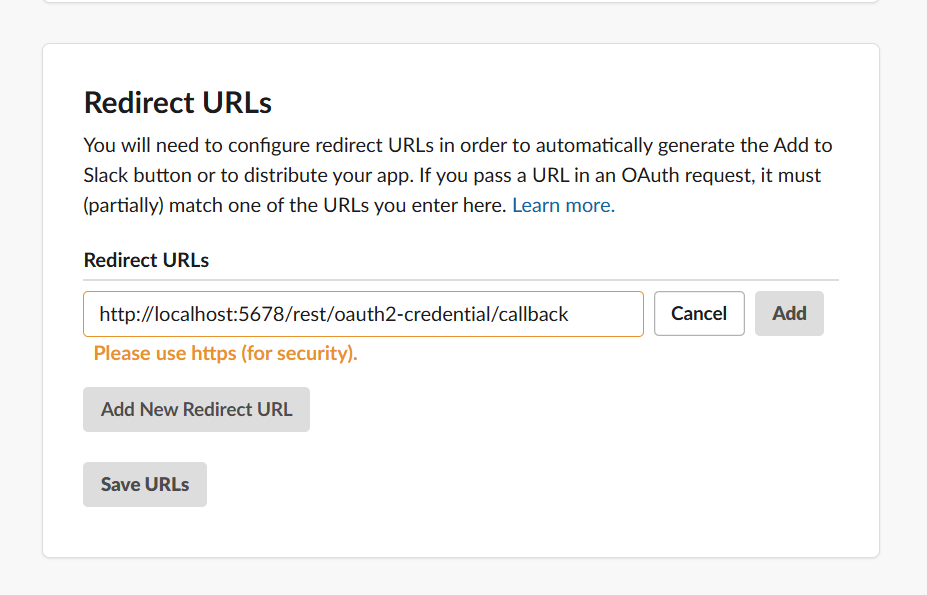
Step 2: Register the Callback URL in Slack
Back in your Slack app → OAuth & Permissions → Redirect URLs → Add New Redirect URL. Paste the callback URL from n8n. Click Add, then Save URLs.
Step 3: Add the Slack Trigger to Your Workflow
Add a Slack Trigger node to a new workflow. Select the OAuth2 credential. Choose which event to listen for:
- Bot / App Mention — fires when someone types
@YourBotNamein a channel - New Message Posted to Channel — fires on every message in a channel
- Reaction Added — fires when someone adds an emoji reaction
For most bots, Bot / App Mention is the right choice. It’s targeted — the trigger only fires when your bot is explicitly called, not on every message in the channel.
Step 4: Connect the Webhook URL to Slack
With the Slack Trigger node open, copy the Webhook URL shown in n8n. There are two versions.
- Test URL (contains
/webhook-test/) — only works when you’re actively listening in n8n editor - Production URL (contains
/webhook/) — works only when the workflow is Active
In your Slack app → Event Subscriptions → toggle Enable Events to on → paste the webhook URL in the Request URL field. Slack will immediately try to verify it.
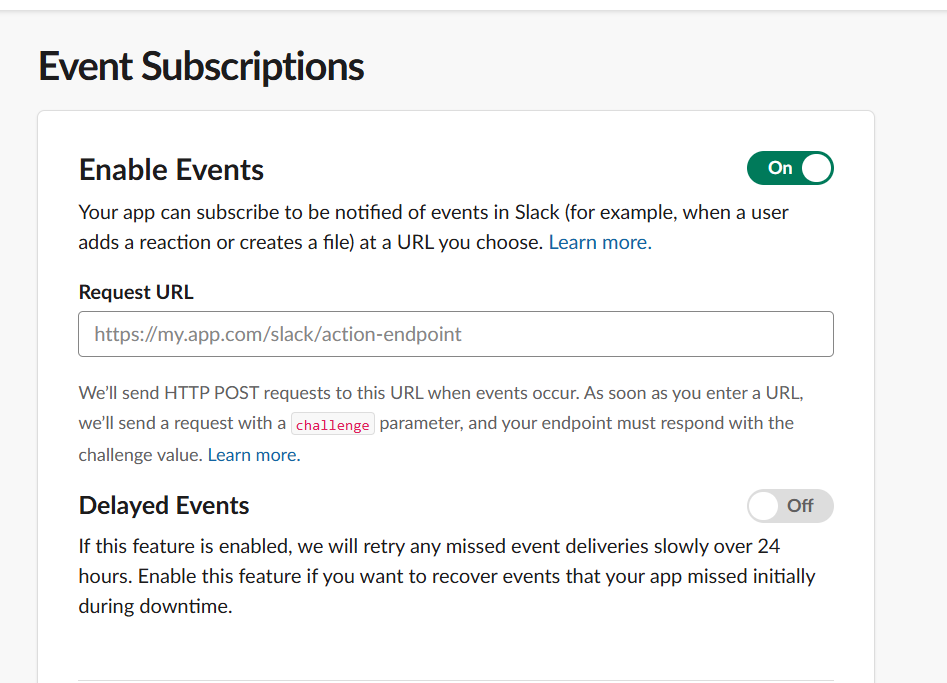
One webhook URL per Slack app. Slack allows only a single Request URL registered per app. You cannot have the test URL and the production URL active at the same time. While building and testing: use the Test URL, with n8n listening. Before going live: swap to the Production URL in Slack’s Event Subscriptions, then activate your workflow.
Once the URL verifies, subscribe to the bot events you want. For Bot/App Mention, add app_mention under Subscribe to bot events.
Step 5: Add the Signing Secret
This is optional but strongly recommended. It ensures n8n only processes requests that genuinely came from Slack — not from someone who guessed your webhook URL.
In your Slack app → Basic Information → copy the Signing Secret. In your n8n Slack credential → paste it into the Signature Secret field.
Step 6: Activate the Workflow
Toggle the workflow to Active in the top right. Until it’s active, the Slack Trigger won’t receive anything even if the Production URL is registered.
Invite your bot to a channel (/invite @YourBotName), then mention it: @YourBotName hello. Check your workflow’s execution history — you should see the trigger fired with the message data.
4 Errors That Break Slack Integrations in n8n
These show up constantly in the n8n community forum. Each one has a specific fix.
1. not_in_channel error
Your bot hasn’t been invited to the channel. Fix: in Slack, go to the channel and type /invite @YourBotName. Every channel requires a separate invite.
2. Messages sending from your personal account, not the bot
You created an OAuth2 credential and used it for the Slack node. OAuth2 acts on behalf of your user profile. Fix: create a separate Access Token credential using your xoxb- bot token, and use that for the Slack node instead.
3. Workflow ran fine in testing, silently fails 12 hours later in production
Token rotation is enabled on your Slack app. The xoxb- token expires every 12 hours. Fix: you cannot disable token rotation once it’s on. You need to delete the Slack app and create a new one — this time leaving token rotation off during setup.
4. Slack Trigger fires in testing but not in production
Two possible causes. First: the workflow isn’t active — toggle it to Active in n8n. Second: the Test URL is still registered in Slack’s Event Subscriptions. When you activate the workflow, you also need to manually update the Request URL in your Slack app from the Test URL to the Production URL.
Using Slack as an AI Agent Approval Channel
Slack node can be used as a human-in-the-loop step inside AI Agent workflows.
When an agent is about to take a high-stakes action like sending a bulk email, deleting a record, posting to a production channel, it can pause and route an approval request to Slack.
The approver clicks approve or deny directly in Slack, and the agent continues or stops.
This is configured at the tool level in the AI Agent node.
The Slack node becomes a gated tool that requires sign-off before execution. If you’re building AI agent workflows, this is worth knowing about – it removes the need for fragile prompt-based guardrails like “only do this if you’re absolutely sure.“
The Slack node is one of the most-used integrations in n8n for a reason, having your automation post results directly to where your team already works is genuinely useful.
Once the credentials are set up correctly, the node itself is straightforward. The setup is the hard part, and now you’ve done it once.