Most people find the Summarization Chain node the same way – they’re building an AI workflow, they see it in the node panel, and they have no idea what it actually does or how it connects to anything.
The official docs tell you what the parameters are. They don’t tell you when to use Map Reduce vs Stuff, what the output looks like when it comes out, or why your text isn’t getting summarized even though the node ran without errors.
That’s what this covers.
What is Summarization Chain
A Summarization Chain is a pre-built sequence of operations from Langchain – a popular AI framework – where each step passes its output to the next, all wired together to accomplish one specific task. In this case, that task is taking long text, breaking it into manageable pieces, sending those pieces to a language model, and returning a condensed summary.
What the Summarization Chain Node Actually Does
The Summarization Chain is an AI node – part of n8n’s LangChain integration. It takes text as input, sends it to a language model, and returns a natural language summary.
Before anything else, get clear on what it is not: there’s also a core node in n8n simply called “Summarize”. That one has nothing to do with AI. It aggregates data like a pivot table, counting rows, summing values, grouping fields. Completely different tool.
The Summarization Chain is also not an Agent. Chains in n8n have no memory. Each execution is stateless – the node takes text in, returns a summary out, and forgets everything. If you need the model to remember previous messages or carry on a conversation, you need an AI Agentic workflow instead.
For one-shot summarization tasks – “take this article and give me a 3-sentence summary” – the chain is exactly the right tool.
The Three Ways to Feed It Data
When you open the Summarization Chain node, the first setting you’ll see is Data to Summarize. This dropdown has three options, and everything else in the node changes based on which one you pick. This is where most people get confused.
Node Input (JSON) – Use this when the text you want to summarize is already flowing through your workflow as a JSON field. If you pulled content from an HTTP Request, read rows from Google Sheets, or received data from a webhook, this is your option. You point the node at the field that contains the text, and it handles the rest.
Node Input (Binary) – Use this when the previous node passed along a binary file – a PDF, a Word document, an uploaded file. The node reads the binary data directly. You don’t need to extract the text first.
Document Loader – Use this when you want to connect a sub-node (like the Default Data Loader) that pulls in documents from an external source. This option unlocks the sub-node connection point at the bottom of the Summarization Chain node.
Here’s a quick reference for common situations:
| What you’re summarizing | Input mode you use |
|---|---|
| Text from an HTTP Request or webhook | Node Input (JSON) |
| Rows from Google Sheets | Node Input (JSON) |
| PDF file from Google Drive | Node Input (Binary) |
| Multiple documents via a loader sub-node | Document Loader |
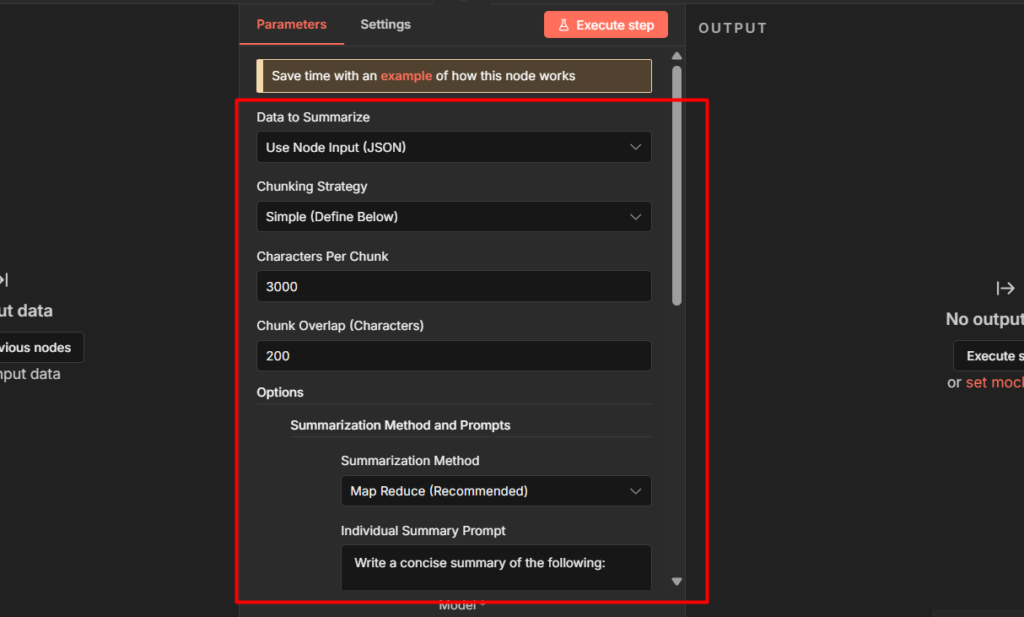
Once you pick Node Input (JSON), you’ll see a Chunking Strategy setting appear. This controls how the node splits your text before sending it to the model. Simple is fine for most cases. set Character per chunks to around 3000 and Chunk Overlap to 200. The overlap means consecutive chunks share some content at the boundaries, which helps the model produce coherent summaries across chunks.
Map Reduce, Stuff, or Refine – Which One to Use
By default, the Summarization Chain uses Map Reduce. To see or change the method, click Add Option and select Summarization Method and prompts.
Here’s what each method actually does and when to use it:
| Method | How it works | Best for | Watch out for |
|---|---|---|---|
| Map Reduce | Summarizes each chunk separately, then combines the summaries into a final result | Long documents, articles, multi-page content | Fires parallel API calls – can cause timeouts with local models like Ollama |
| Stuff | Sends all the text in one single API call | Short text, single emails, brief content | Fails silently if the text exceeds the model’s context window |
| Refine | Summarizes the first chunk, then iteratively passes each new chunk alongside the running summary | When you need coherence across a long document | Slowest method – makes sequential API calls, one per chunk |
Map Reduce is the right default for anything longer than a few hundred words. It’s what n8n recommends and what handles chunking most reliably.
Use Stuff when you’re certain the text is short enough to fit in one LLM call – a single email, a short review, a product description. It’s faster and cheaper.
Use Refine only when you’ve tried Map Reduce and the output feels disconnected. It’s the most token-intensive option.
One Known UI issue with Map Reduce: When you enable Summarization Method and Prompts in Map Reduce mode, the two prompt fields shown in the UI are displayed in the wrong order. The first field you see is actually the Final Prompt to Combine (the prompt used to merge all chuk summaries into the final output), and the second is the Individual Summary Prompt (the prompt used on each chunk). The labels say the opposite. If you’re customizing these prompts, double-check which field you’re editing – It’s the reverse of what the UI shows.
Let’s Build It: Summarize Articles from an RSS Feed
This workflow reads the latest articles from an RSS feed, summarizes each one, and gives you the output you can route into Slack, Notion, or anywhere else. It uses Node Input (JSON) – the most common setup.
You’ll need an AI credentials connected in n8n. If you haven’t set that up yet, then make sure to check the credentials and service guide here.
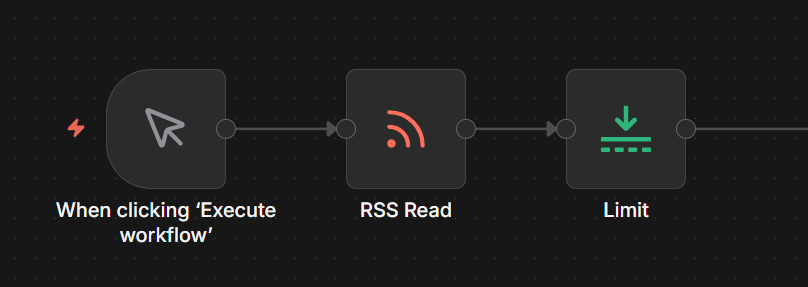
Step 1: Add a Manual or Schedule Trigger
If you’re setting up a schedule trigger, Set it to run once daily. This keeps API costs predictable during the testing, you’re not burning tokens every time you manually trigger the workflow.
Step 2: Add an RSS Read Node
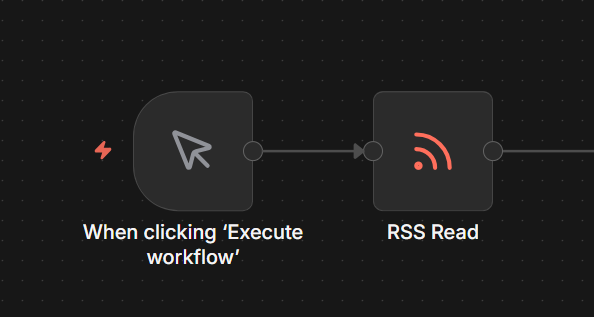
Connect it to the trigger. Set the URL to any feed you want – for testing, https://hnrss.org/frontpage (Hacker News) works well.
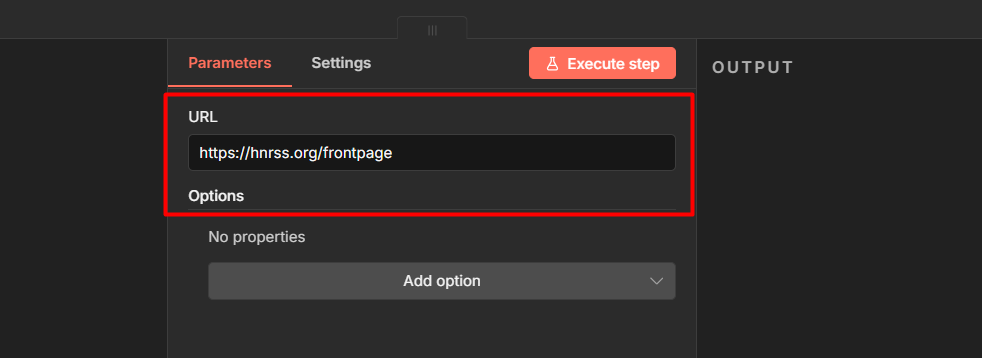
Configure it as:
- Feed URL: your RSS source
- Limit: leave at default for now
This outputs one item per article, each with fields like title, link, and content.
Step 3: Add a Limit Node
Connect it after the RSS Read node. Set keep items to 2
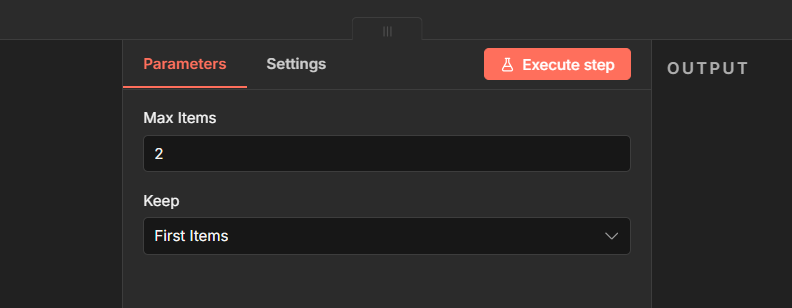
During testing, don’t summarize 50 articles at once. Test with 2, confirm everything works, then remove the limit when you’re ready to go live.
Step 4: Add the Summarization Chain Node
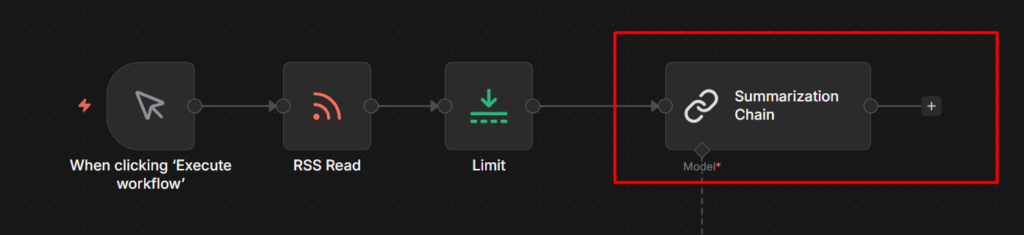
This is the main node. Connect it after the Limit node.
Configuration:
- Data to Summarize: Node Input (JSON)
- Input: Click the expression editor and map it to the content field from the RSS node. for Hacker News this is
{{ $json.content }}. For other feeds it might be{{ $json.description }} or {{ $json['content:encoded'] }}– check your RSS node output to confirm the field name. - Chunking Strategy: Simple
- Character Per Chunk: 3000
- Chunk Overlap: 200
- Click Add Option – Summarization Method and Prompts
- Summarization Method: Map Reduce
- Leave the prompt fields at their default to start. Once it’s working you can customize them. Just remember the UI Swaps the label order – the top field is the Final Prompt, the bottom is the Individual Summary Prompt.
Step 5: Connect the Chat Model Sub-Node
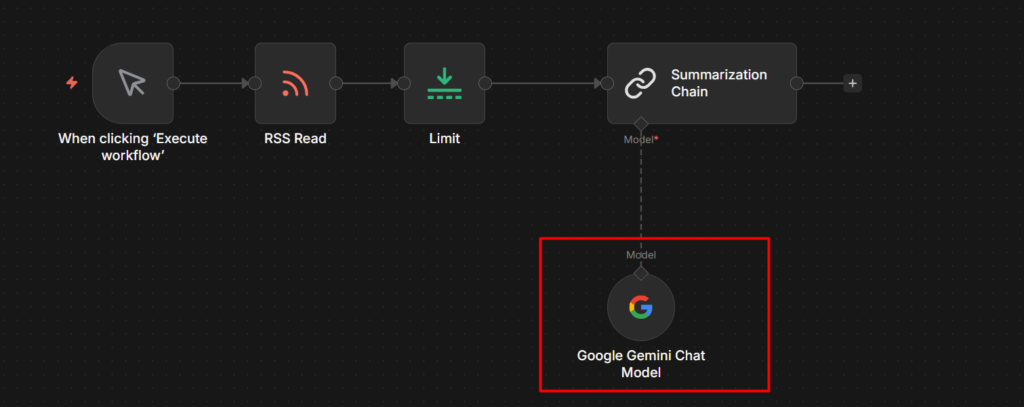
Click the + icon on the Model connection point at the bottom of the Summarization Chain node. Search for Gemini and add Gemini Chat Model.
In the Gemini Chat Model settings:
- Credential: select your gemini credential
- Model: 2.5 flash works well here – it’s fast, cheap, and more than capable for summarization.
Step 6: Run it and Check the Output
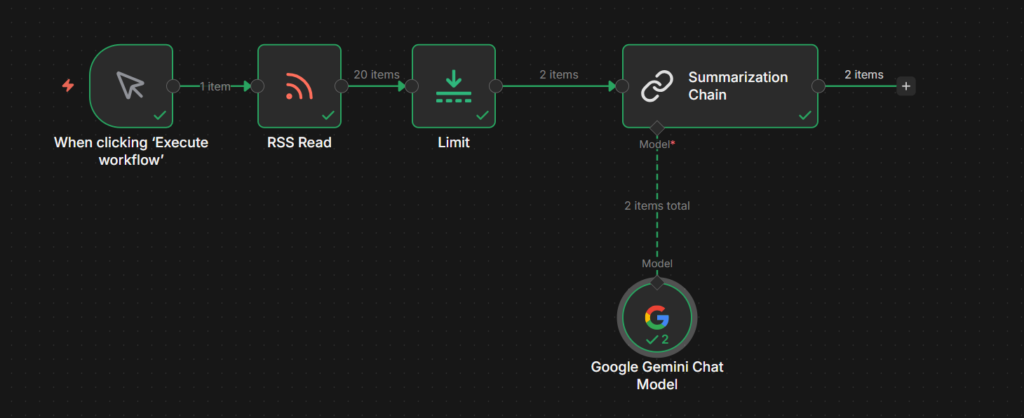
Execute the workflow. Click the Summarization Chain node after it runs.
The output will look like this:
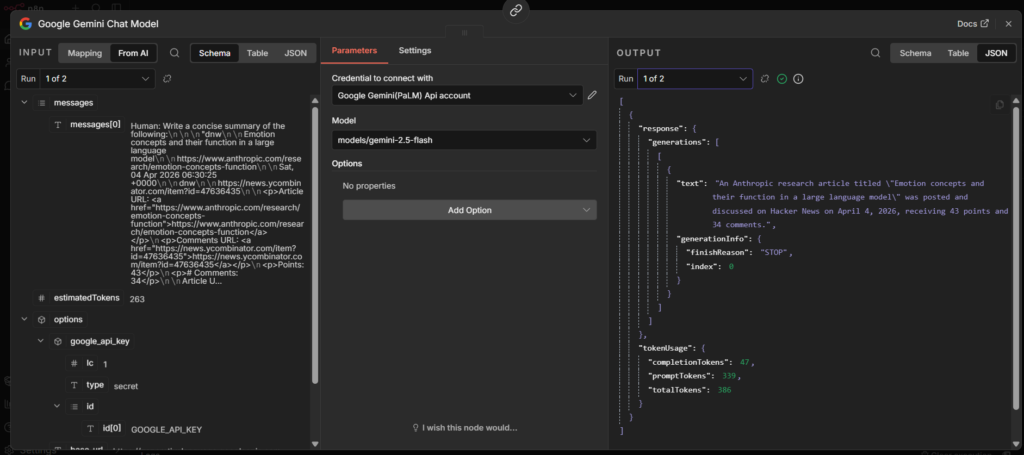
The summary lives inside response.text. This trips people up the first time – the output isn’t just a plain string, it’s nested inside the response object.
To use the summary in the next node, reference it with
{{ $json.response.text }}So if you’re sending to Slack, you message field would be
{{ $json.title }}: {{ $json.response.text }}That’s the complete workflow. Manual trigger > RSS Read > Limit > Summarization Chain > Wherever you want the summaries to go.
To understand more about how data flows between nodes like this, the n8n workflow nodes and data flow guide has a solid breakdown.
When to Use This Instead of AI Agent
The rule is simple. If the task is “text goes in, summary comes out” use the Summarization Chain. It’s purpose-built for that, it’s straightforward to configure, and it costs fewer tokens than routing through an agent.
Use an AI Agent when you need any of the following like memory across multiple interactions, the ability to call external tools or APIs during the tasks, or multi-step reasoning where the model decides what to do next. Agents handle complexity. Chains handle one defined task.
For batch summarization, processing a list of articles, emails, or documents in a workflow – The Summarization chain is the right choice every time.