
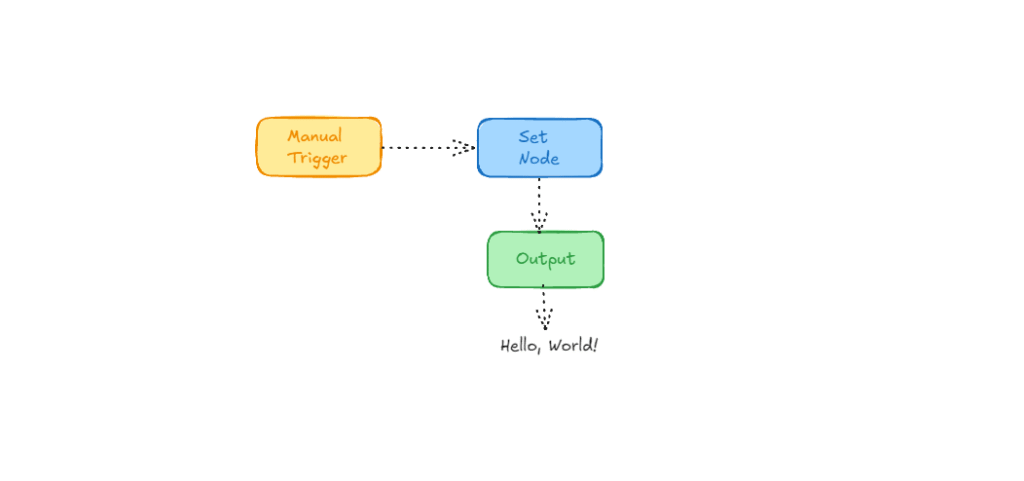
This workflow demonstrates the two core concepts of n8n: Triggers (what’s start the process also known as “Entry point”) and Data Flow (how information moves between nodes).
What you’ll get?
This workflow will teach you on surface level of how we pass the data from A to B. later on, we create more workflows like a real pro. Trust me. Once you complete this workflow, you will get to know many things.
Static Hello World Workflow
This is the easiest workflow in this post, and follow the instructions properly to evade unusual errors.
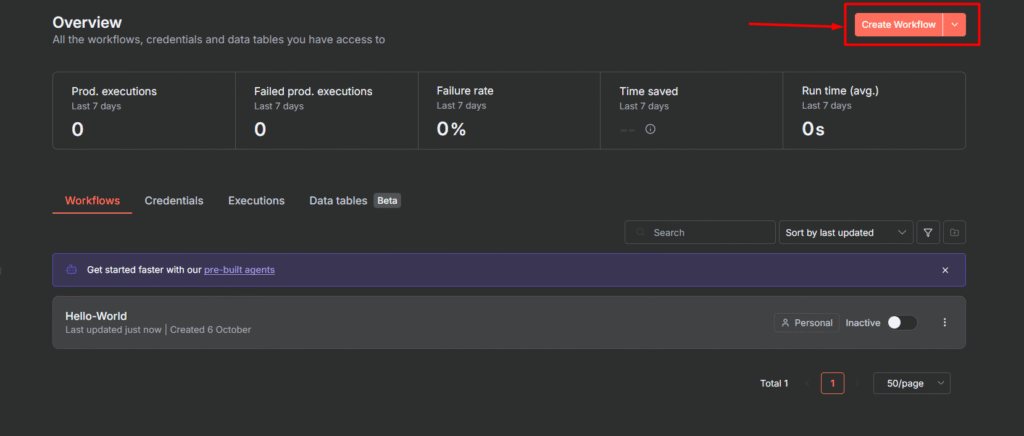
Step 1: New Workflow
Open your n8n instance whether it is self-hosted or cloud, click New in the top navigations or on your dashboard to start a blank canvas.
Step 2: Setup the Trigger Node
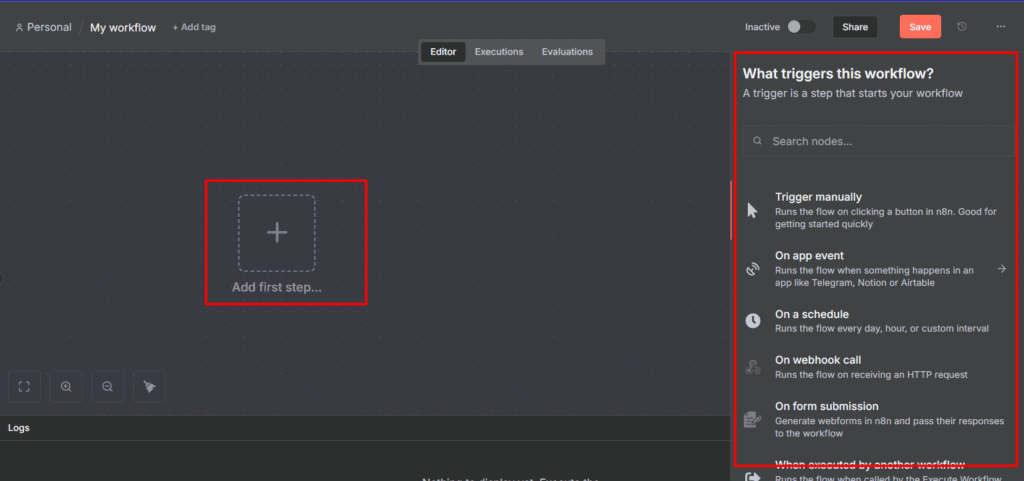
When you click on the “+” icon then sidebar will open up and asks what triggers this workflow? We’ve already talked a lot about triggers, you can check the reference links below once you complete this workflow.
Check it out here: Guide to Workflows, Nodes, and Data Flow
- Select the
Trigger Manually
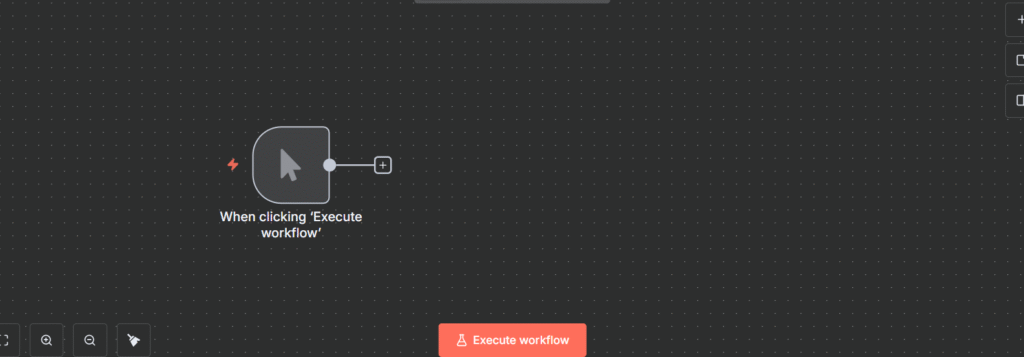
- Once you select the manual trigger, it will appear on the visual editor.
- Do nothing else on this node. It’s configured by default to run when you manually click on the execute workflow.
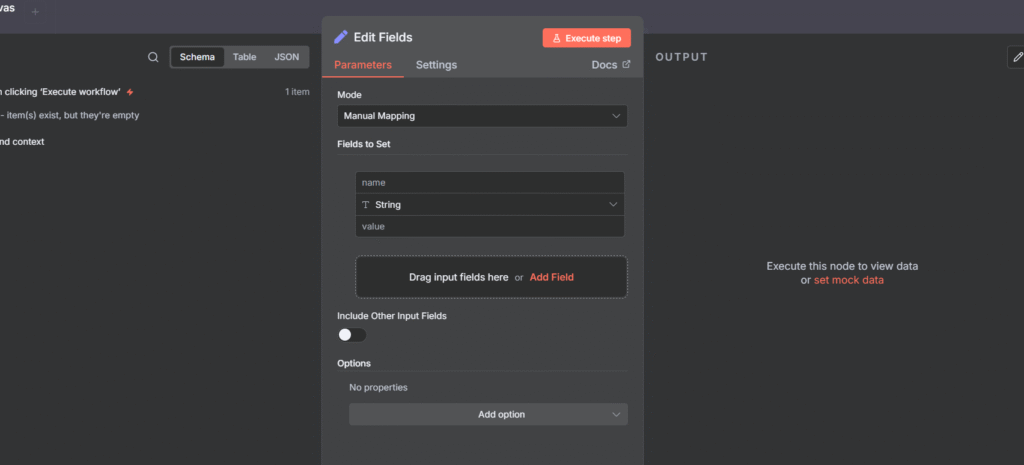
Step 3: Setup Action Node (The “Set” Node)
The Set node is one of the most important nodes, it allows you to create, modify, or remove data fields. This is just perfect node for “Hello World”
- Click the + button next to the Manual trigger node.
- Search for Set and select the node.
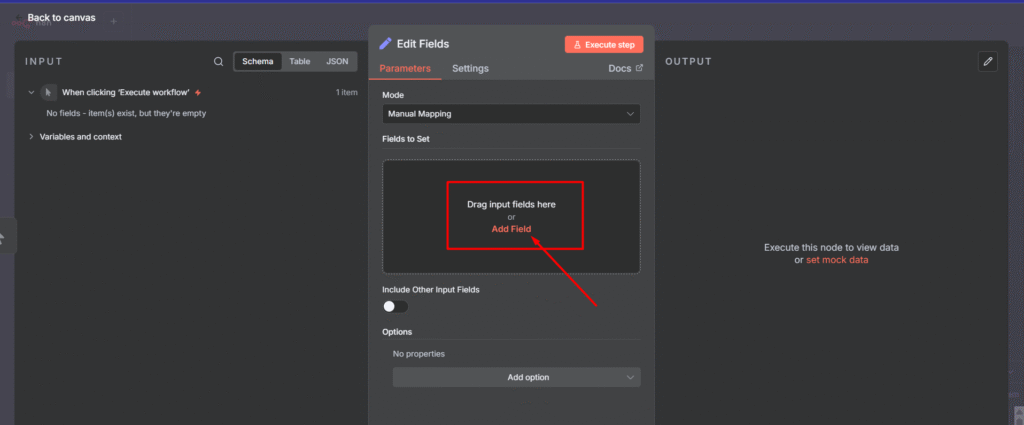
- In the Set Node configuration panel
- Click Add field
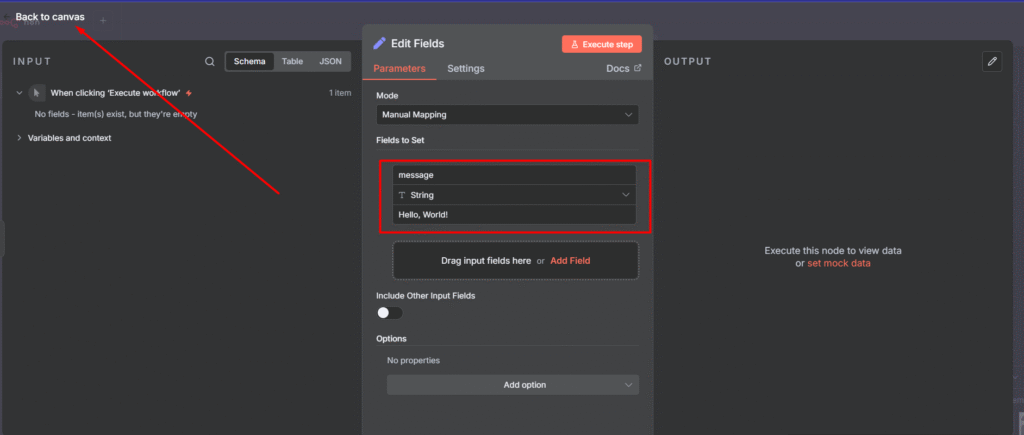
- In the new row, for the Value Name (Key), type
message - For the value (Value), type
Hello, World! - Click on the Back to Canvas or press
esc
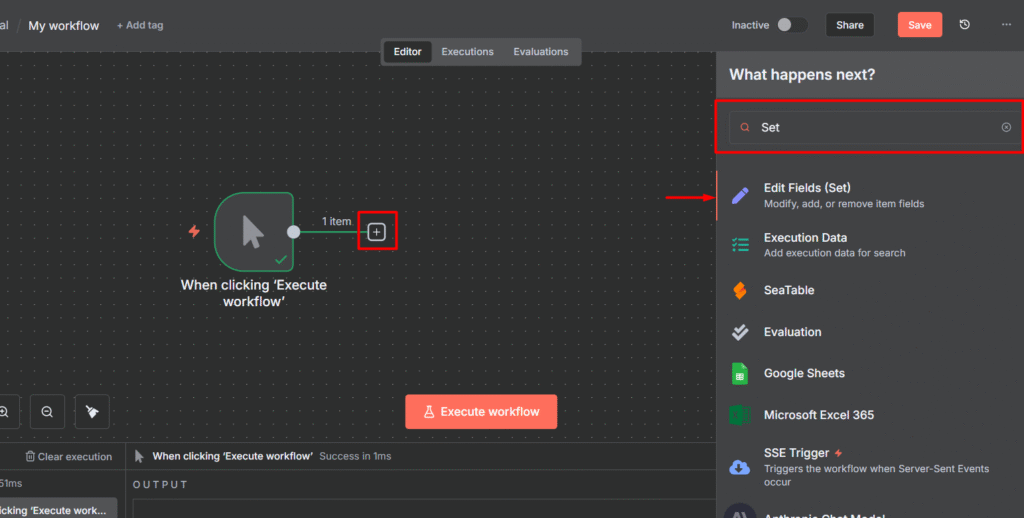
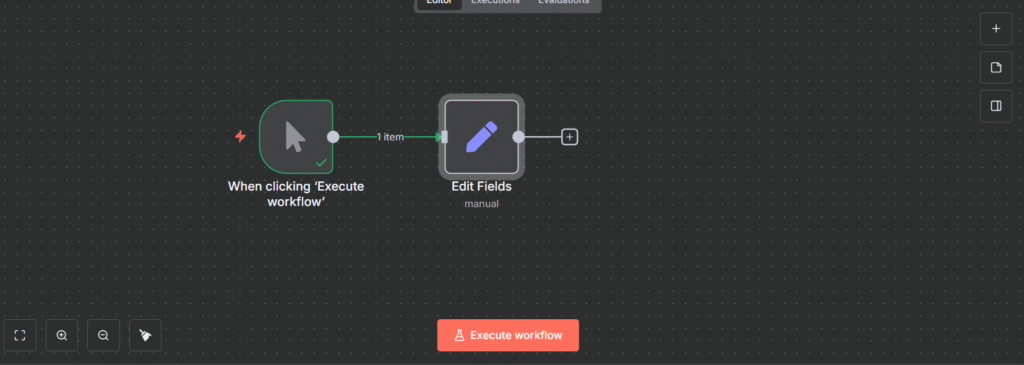
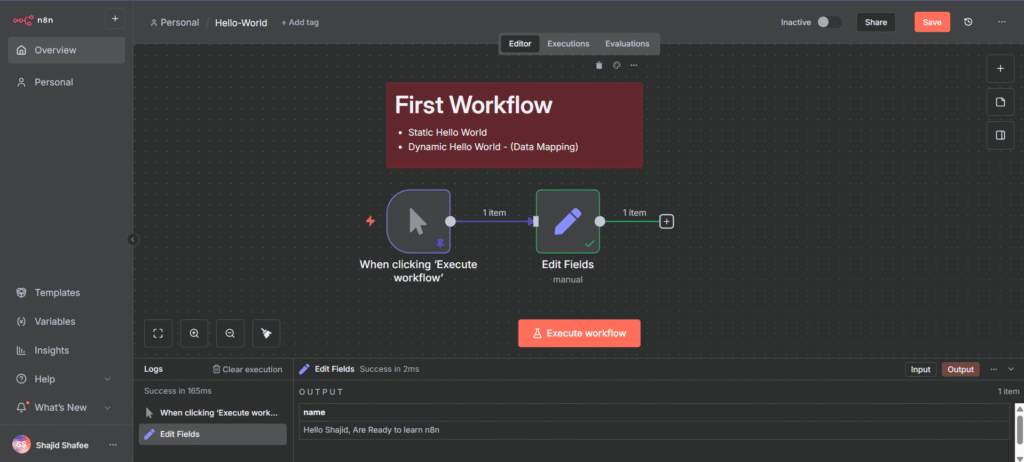
Now your entire canvas shows with two nodes such as manual trigger, and set node. Now hit on Execute Workflow.
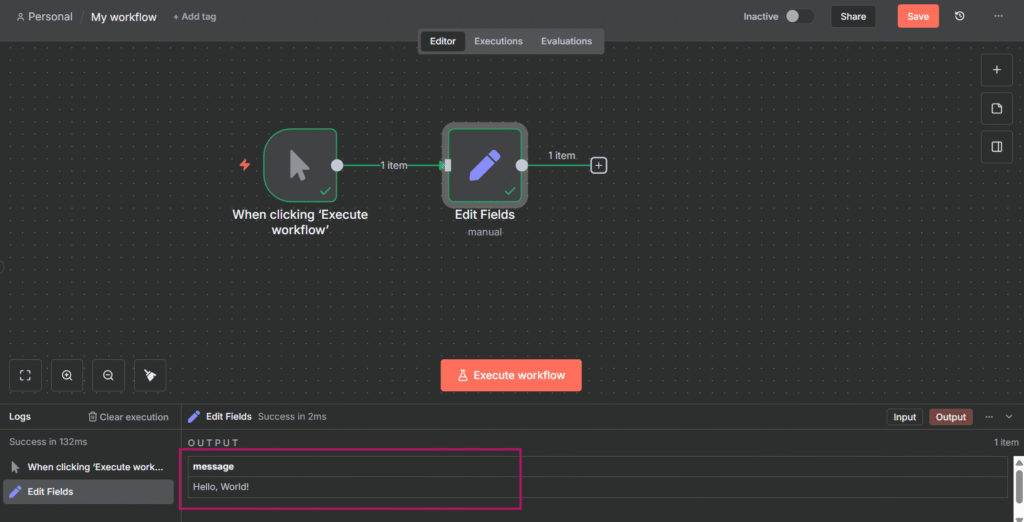

However, you can double click on Set node to see the output. Which message says Hello, World! that’s great isn’t it?
Now let’s dynamically pass down the data
Passing Dynamic Data (Mapping) to Your Workflow
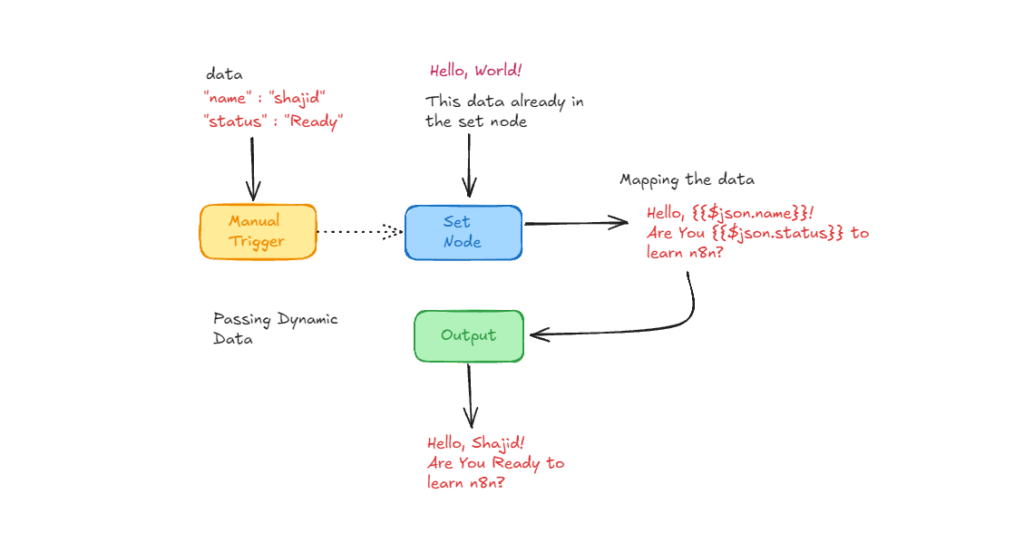
What we are going to do here is we are going to map data directly to Set node.
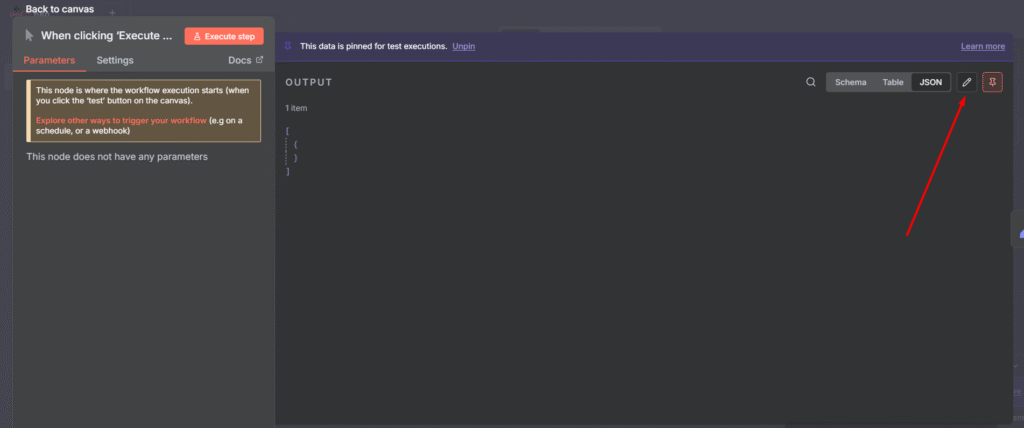
Step 1 : Configure Manual Trigger Node’s Output
- Double click on the Manual trigger node, then go to click on the pencil icon.
- You’ll see a code block space.
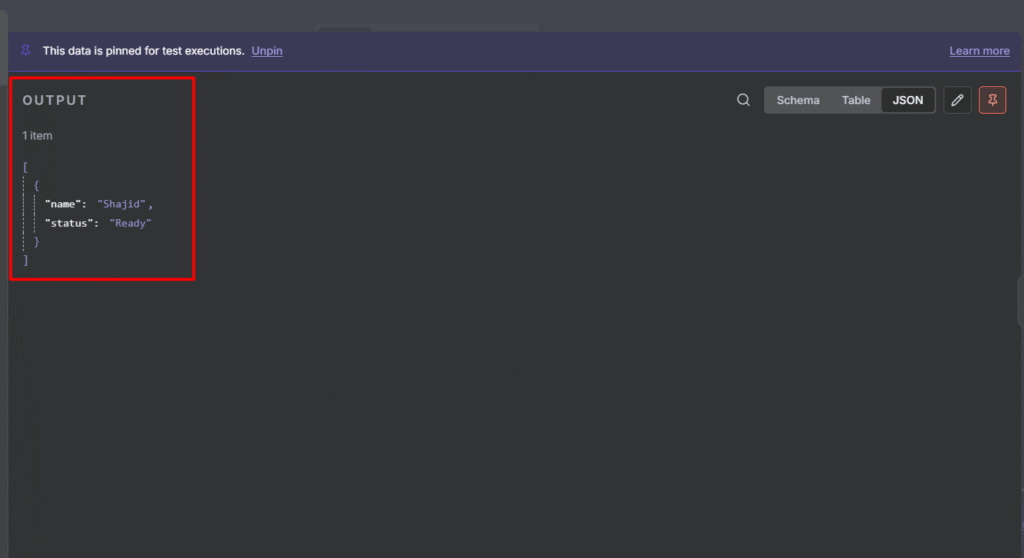
{
  "name": "Add Your Name Here",
  "status": "Ready"
}
Understanding the JSON structure (Optional)
The above JSON (JavaScript Object Notation) is the language of data in n8n. Every piece of data flowing through your workflow will look like this. The manual trigger node here is simulating the data you would receive from a real source. such as contact form submission or a database query.
Step 2: Code Block and Set Node
Each key (name and status) acts as a variable that we can access later using the dollar-sign expression ($).
- Copy the above code block and paste it on the Manual trigger node’s output.
- Save the code block.
- Go back to your canvas > Go to
SetNode. - On the left hand-side, You will see the
name, andstatusvalue pairs.
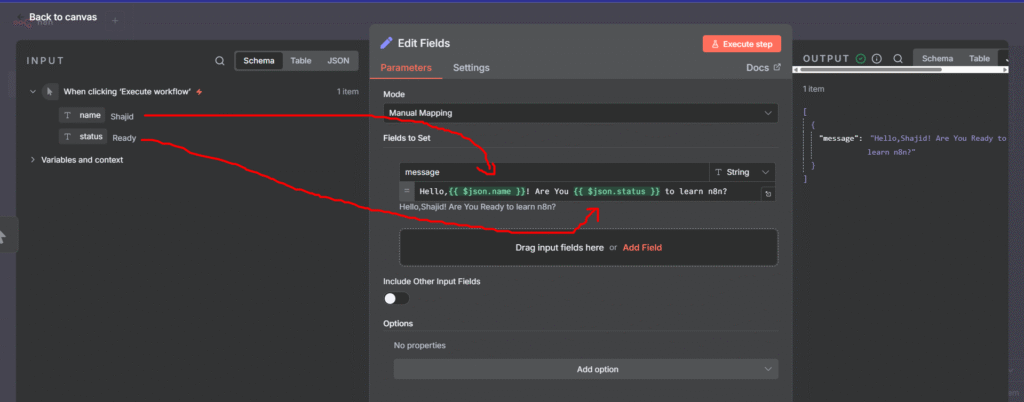
- Now it’s time to map the values that are in the manual trigger.
- Go to your message field, Remove the previous text which
Hello, World! - Replace with
Hello, {{ $json.name }}! Are You {{ $json.status }} to learn n8n? - once you execute the workflow or that specific step, then you can see the output on right hand side.
- Now message contains,
Hello, Shajid! Are You Ready to learn n8n?
Congratulations 🫸🏻, You have created your first n8n workflow successfully. Please share your workflow with us in our reddit community.
Once you’re comfortable with this workflow, head back to the complete n8n beginner guide to tackle the next step
If you’d any issue with the content, let me know directly via an email, [email protected]